Installing a dash cam wire is a straightforward process that involves routing the power cable along the headliner, down the A-pillar, and into the vehicle's fuse box or 12V outlet for a clean, reliable setup.
If you've just bought a new dash cam, you might be staring at that long wire and wondering where on earth it goes. Trust me, I've been there. After installing dozens of dash cams in everything from compact sedans to full-size trucks, I can tell you that learning how to install dash cam wire properly makes the difference between a clean, professional-looking setup and a mess of cables dangling across your dashboard. In this guide, I'll walk you through everything you need to know, from gathering the right tools to hiding every inch of wire like a pro.

Tools and Materials You'll Need
Before you start pulling apart your car's interior, let's make sure you have everything ready. I've learned the hard way that stopping midway to hunt for a screwdriver is incredibly annoying, so gather these items first.
- Dash cam with mounting hardware
- Power cable (usually included with the dash cam)
- Hardwire kit (if you want a permanent installation)
- Trim removal tools (plastic pry tools work best to avoid scratching)
- Microfiber cloth
- Cable clips or adhesive cable holders
- Fuse tap or add-a-circuit (for hardwiring)
- Socket wrench set
- Multimeter (optional but helpful for identifying fuse types)
Pro tip from experience: Skip the metal screwdrivers when working around your car's interior. I once left a small scratch on an A-pillar that drove me nuts for months. Plastic trim tools are worth every penny.

Understanding Your Dash Cam Wiring Options
Most people don't realize there are actually a few different ways to power a dash cam, and each one changes how you'll route the wire. Let me break down the three main options so you can pick the one that fits your needs.
Cigarette Lighter or 12V Outlet Method
This is the easiest route and what most beginners start with. You simply plug the wire into your car's 12V outlet and run it along the edges of your windshield and dashboard. The downside? It occupies your power outlet, and some cars only provide power when the ignition is on, meaning your dash cam won't record while parked.
USB Power Method
Some modern dash cams use USB cables, which can plug into built-in USB ports in your car. This is clean and simple, but it has the same limitations as the 12V outlet method.
Hardwiring Method
This is the gold standard for serious dash cam users. Hardwiring connects the dash cam directly to your car's fuse box, giving you constant power (even when the car is off) if you use a battery pack or parking mode feature. It looks completely clean since no wires are visible in the cabin, and your 12V outlet stays free for other devices. The trade-off is that it takes more time and requires basic electrical knowledge.
I personally hardwire all my dash cams now. Once you learn the process, it's not that much harder than the plug-in method, and the result looks infinitely better.
Preparing Your Vehicle for Installation
Taking a few minutes to prep your car will save you headaches later. Think of it like setting up your workspace before starting a home project.
First, park your car in a shaded area or garage. Direct sunlight makes the interior unbearably hot and can warp adhesive mounts. Turn off the engine and remove the key from the ignition. Open all the doors to give yourself plenty of room to work.
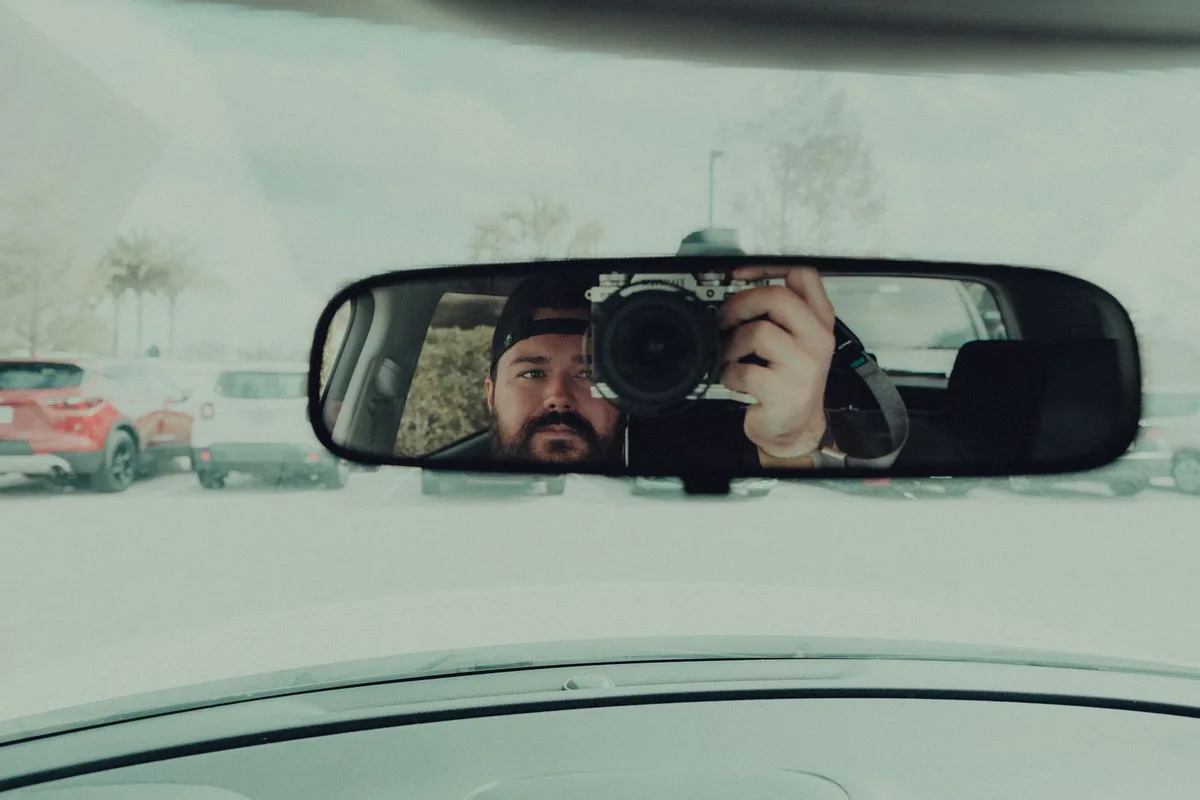
Clean your windshield thoroughly where the dash cam will mount. I use a microfiber cloth with a tiny bit of glass cleaner. Any dust or oil will prevent the adhesive from sticking properly, and the last thing you want is your dash cam falling off during a sharp turn. Position the dash cam just behind or beside your rearview mirror, ensuring it doesn't block your view of the road. Most drivers find that placing it slightly to the passenger side of the mirror works best.

How to Install Dash Cam Wire: Step-by-Step Guide
Now for the main event. I'll walk you through both the simple 12V method and the more advanced hardwiring method so you can choose what works for you.
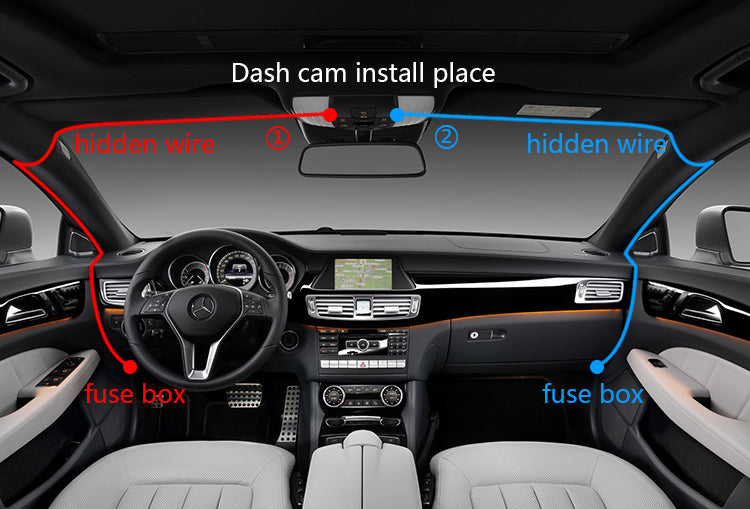
Method 1: Running the Wire Through the Headliner (Both Methods)
This part is the same whether you're plugging into a 12V outlet or hardwiring.
- Mount your dash cam and attach the power cable to it.
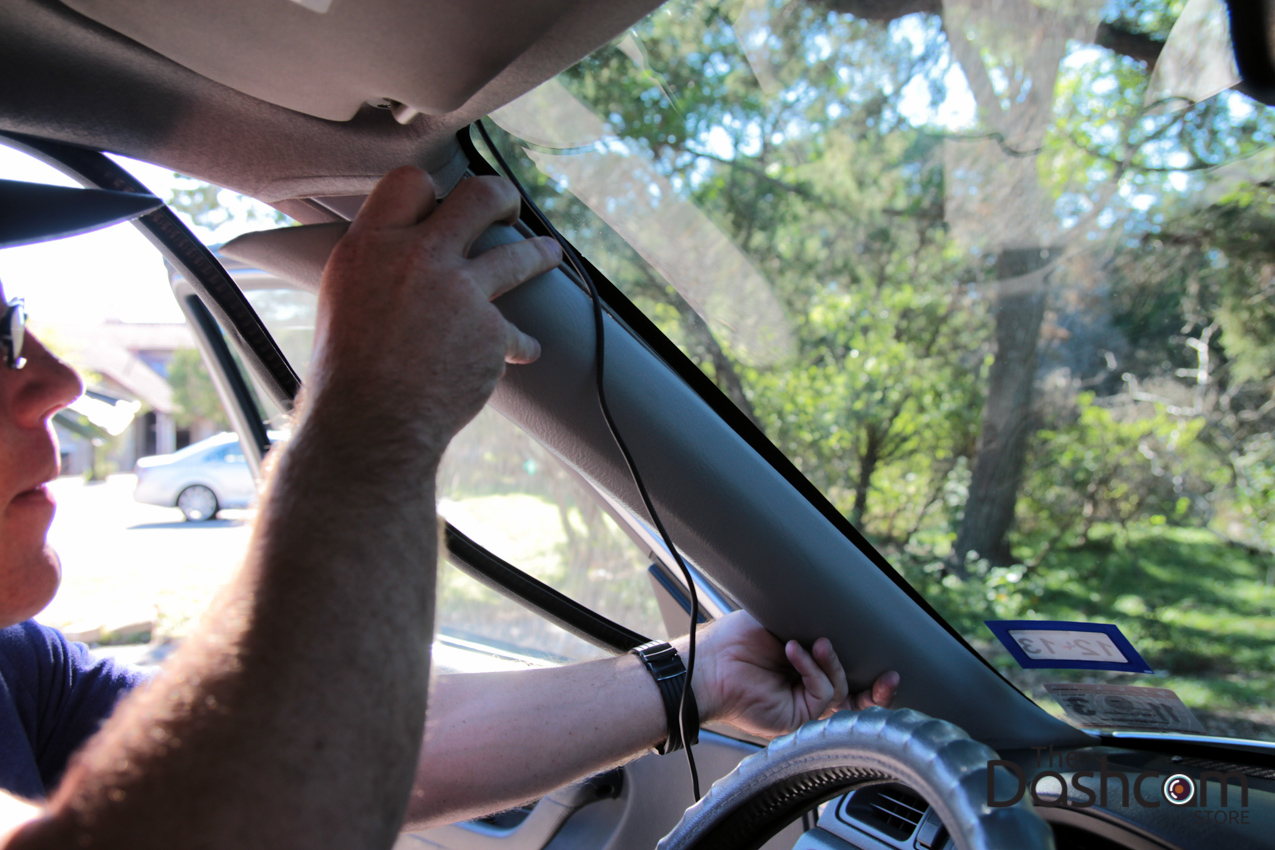
- Tuck the cable into the gap between the headliner and the windshield. Gently press it in with your fingers, working your way across the top of the windshield toward the passenger side A-pillar.
- Continue routing the wire down the A-pillar. Here's a critical safety tip: modern cars have side curtain airbags hidden behind the A-pillar trim. Always route the wire behind the airbag, not in front of it, and never pull hard on the trim. You can usually pop the A-pillar cover off gently with a plastic trim tool, tuck the wire behind it, and snap it back into place.
- Run the wire along the top edge of the dashboard or down into the kick panel area, depending on where your power source is.
The headliner technique creates a virtually invisible wire run. When done correctly, nobody would ever know there's a dash cam in your car unless they looked directly at it.
Method 2: Connecting to a 12V Outlet
- Route the wire from the A-pillar down to your 12V outlet location.
- Use cable clips or adhesive holders to secure any slack.
- Plug the adapter into the 12V outlet.
- Test the dash cam to make sure it powers on.
- Tuck any excess wire into a hidden area, like under the center console or in the glove box.
Method 3: Hardwiring to the Fuse Box
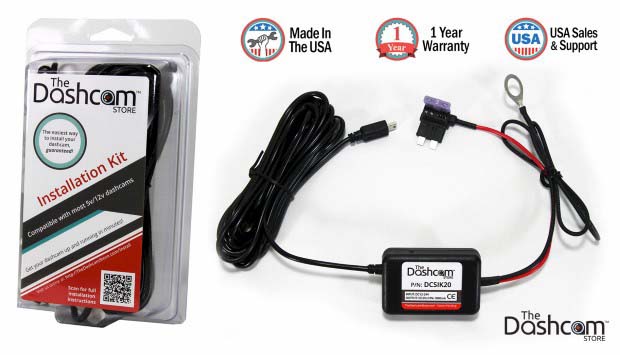
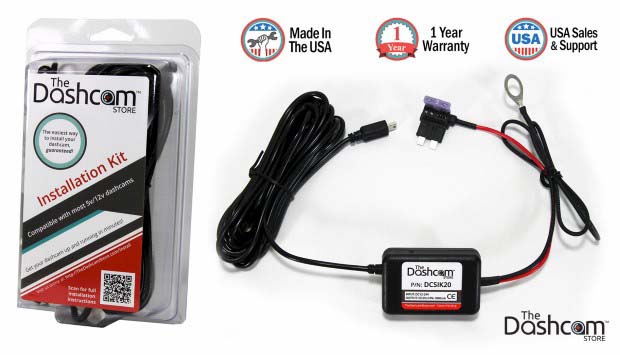
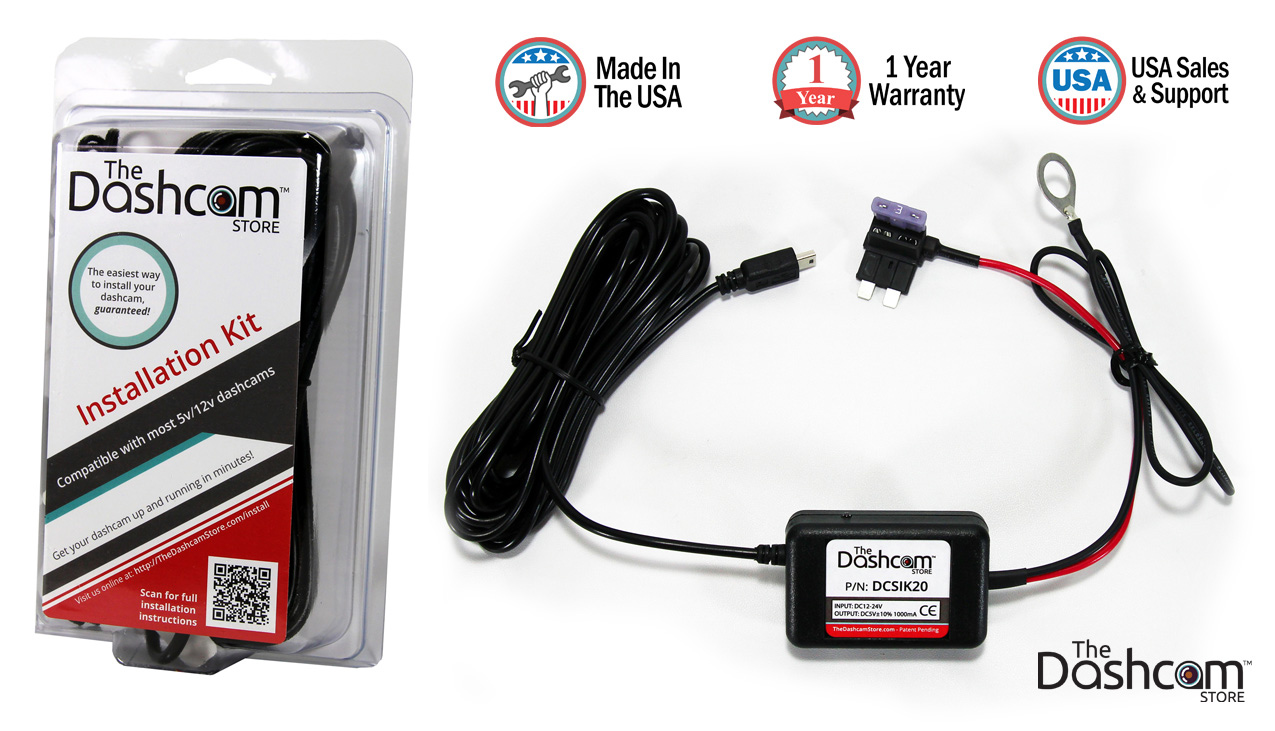
This method requires a hardwire kit, which typically includes a voltage cutoff to protect your car battery.
- Locate your car's fuse box. It's usually under the dashboard on the driver's side, but check your owner's manual for the exact location.
- Identify a fuse that provides switched power (turns on with the ignition) for normal recording mode, and a constant power fuse for parking mode. Your hardwire kit will have three wires: yellow (constant), red (switched), and black (ground).
- Use a fuse tap to connect the appropriate wires. The fuse tap plugs into the fuse slot, allowing you to maintain the original circuit while adding your dash cam.
- Connect the ground wire to a metal bolt or screw attached to the car's chassis. Look for an existing grounding point near the fuse box.
- Route the cable from the fuse box up through the kick panel, along the A-pillar, and across the headliner to your dash cam.
- Test everything before reassembling the trim.
Common Mistakes to Avoid When Routing Dash Cam Wires
Over the years, I've made just about every mistake possible, so let me save you some frustration.
- Rushing the wire behind the airbag: This is genuinely dangerous. If the airbag deploys, a wire in its path can become a projectile. Always verify airbag locations before routing.
- Using excessive force on trim pieces: Car interiors are held together with delicate clips. If something doesn't want to come off, stop and figure out why rather than yanking harder.
- Blocking the driver's view: A dash cam placed too low or too central can obstruct your sightline. Test your visibility from the driver's seat before finalizing the position.
- Forgetting to leave slack: If the wire is too tight near the mount, it can stress the connection point. Leave a small loop of slack where the cable meets the dash cam.
- Ignoring the parking mode feature: If your dash cam has parking mode, hardwiring is the only way to use it. Don't lose out on this valuable feature because you didn't want to spend an extra 20 minutes on installation.

Tips for a Professional-Looking Installation
Want your installation to look like it came from a professional shop? These tricks will help.
Use adhesive cable clips every six to eight inches along the wire path. They keep the wire snug against the headliner and prevent sagging over time. Choose clips that match your interior color for an even cleaner look.
When running wire along the A-pillar, run it along the edge closest to the windshield, not the door side. This hides it better and keeps it away from the door seal.
If you have a rear dash cam as well, route the rear cable through the headliner, down the passenger side B-pillar or C-pillar, and into the rear hatch or trunk area. The same airbag rules apply for any pillar with side curtain airbags.
Consider using a Bluetooth or WiFi dash cam that lets you review footage on your phone. This eliminates the need to run a long USB cable to your computer for footage retrieval.
Testing Your Dash Cam Installation
Before you button everything up, testing is essential. I always do a full system check after any installation.
Turn on your car and confirm the dash cam powers up automatically. Check that the camera angle captures the road ahead properly, with the horizon roughly in the middle of the frame. If your dash cam has GPS, make sure it's getting a signal by checking the app or display. For hardwired installations, verify that the parking mode actually works by turning off the car and waiting a few minutes to see if the camera remains active. Finally, take a short test drive and review the footage to ensure the image quality meets your expectations.

Frequently Asked Questions
Can I install a dash cam wire without any tools?
Yes, but only if you're using the 12V outlet method. You can tuck most wires into the headliner and A-pillar gaps using just your fingers, though the result may be less clean. For a truly hidden installation, basic trim tools are highly recommended.
How long does it take to install dash cam wiring?
A simple 12V outlet installation takes about 15 to 30 minutes for beginners. Hardwiring typically takes 45 minutes to an hour the first time, but becomes much faster once you've done it a few times.
Is hardwiring a dash cam safe for my car's battery?
When done correctly with a proper hardwire kit that includes a voltage cutoff, yes. The voltage cutoff prevents the dash cam from draining your battery below a safe level, so you can leave your car parked for days without worry.
Where should I route the dash cam wire in cars with side curtain airbags?
Always route the wire behind the airbag, meaning the wire should be tucked into the headliner side, not the dashboard side, of the A-pillar. This keeps the wire out of the airbag's deployment path.
Can I use the same power cable for a front and rear dash cam?
Some dash cam systems use a single cable that splits to power both cameras, while others require separate cables. Check your specific model's manual, as this varies widely between manufacturers.
Conclusion
Learning how to install dash cam wire is one of those skills that looks intimidating at first but becomes second nature once you understand the basics. Whether you choose the simple 12V outlet method or go all-in with a hardwired installation, the key is taking your time, respecting the airbag locations, and using proper trim tools to keep your interior looking pristine. A clean wire installation not only makes your car look better but also ensures your dash cam functions reliably for years to come.
Now that you know exactly how to install dash cam wire, grab your tools, pick a method that matches your comfort level, and give it a try this weekend. Once you see that perfectly hidden wire and crisp footage rolling in, you'll wonder why you waited so long. If you have questions about a specific vehicle or dash cam model, drop a comment below. I'd love to help you troubleshoot your setup!