Installing a dash cam is a straightforward DIY project that typically takes 15–30 minutes, requires only basic tools, and involves mounting the camera, routing the power cable, and connecting it to a power source.
If you've just bought a dash cam and you're staring at the box wondering where to even begin, you're not alone. Most people think installing a dash cam is some complicated wiring job, but I can tell you from years of experience testing and setting up dozens of these little gadgets in all kinds of cars that it's actually one of the easiest car mods you can do. Whether you drive a compact sedan, a pickup truck, or an SUV, the basic process is pretty much the same.
In this guide, I'll walk you through everything you need to know about how to install a dash cam, from choosing the right spot on your windshield to hiding the wires so cleanly that it looks like your car came with one from the factory. I'll share the small mistakes I made the first time I installed mine so you don't have to learn the hard way.
What You Need Before You Start
Before you stick anything to your windshield, it's smart to gather your tools and understand what you're working with. Nothing kills the excitement of a new gadget faster than having to stop halfway through because you're missing a piece.
Here's a quick checklist of what you'll typically need:
- The dash cam itself, including the mount
- A microSD card if one didn't come in the box
- The power cable and car charger adapter
- A plastic trim tool or a flat credit card for tucking wires
- A clean microfiber cloth and some glass cleaner
- Optional cable clips or adhesive pads
- Optional hardwiring kit if you want a cleaner look
From my own experience, the trim tool is the one thing most people forget. I tried using a butter knife the first time and ended up scratching my A-pillar trim slightly. Lesson learned: spend the two bucks on a proper plastic tool.
Choosing the Right Mounting Location
Where you place your dash cam makes a huge difference in how well it performs. The goal is to get a clear, unobstructed view of the road while staying within the law.
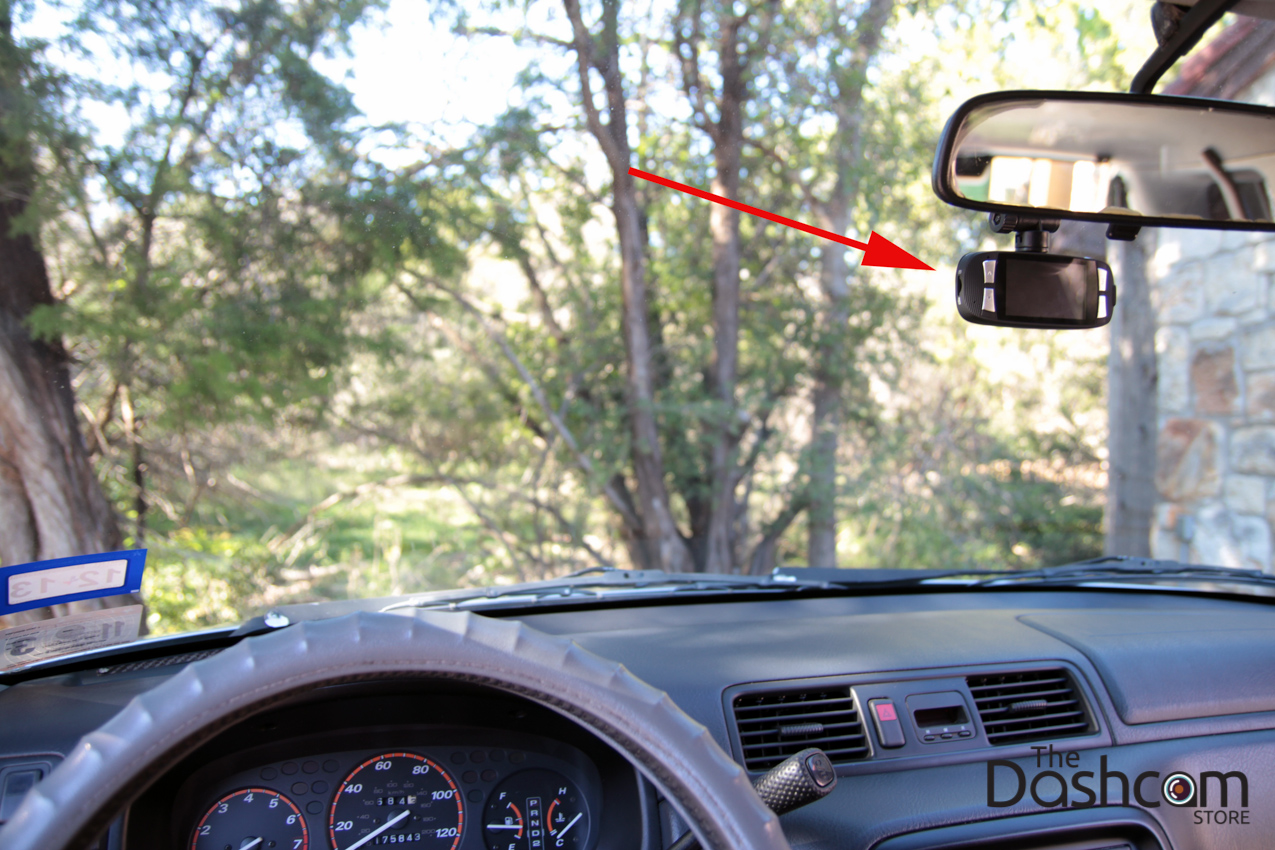
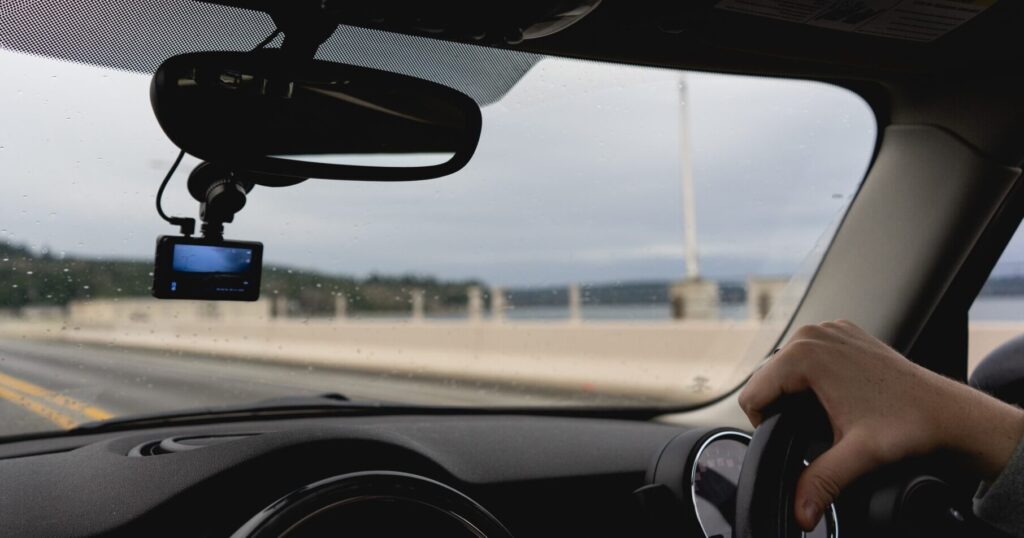
Most drivers mount their dash cam right behind the rearview mirror, slightly off to the passenger side. This spot keeps it out of your line of sight and gives you a balanced view of the road ahead. The camera lens should sit within the area swept by your windshield wipers so it stays clear during rain.
Here are the key things to keep in mind when picking your spot:
- Stay out of the driver's direct line of sight
- Keep the lens within the wiper sweep zone
- Avoid placing it over any dark tint strips at the top of the windshield
- Make sure it doesn't block your view of traffic signals
- Center it as much as possible for accurate lane recording
A good rule of thumb I always follow is to mount the cam so it captures about 60% road and 40% sky. Too much sky and your footage will look washed out. Too little sky and you'll miss important context like traffic lights.

How to Mount the Dash Cam on Your Windshield
Once you've found the perfect spot, mounting is usually as simple as peel and stick. Most modern dash cams use either a suction cup or an adhesive pad.
If your dash cam uses a suction mount, here's the process:
- Clean the glass thoroughly with glass cleaner and a microfiber cloth
- Let the area dry completely
- Moisten the suction cup slightly with water
- Press the mount firmly against the glass and flip the locking lever
- Wait a few minutes before attaching the camera to let the suction set
If you're using an adhesive mount, the process is even simpler but less forgiving:
- Clean and dry the mounting area
- Peel off the protective film from the adhesive pad
- Press the mount firmly against the glass for at least 30 seconds
- Wait 15 to 20 minutes before attaching the camera body
Honestly, I prefer adhesive mounts for long-term installs. Suction cups are great if you move the cam between vehicles, but they tend to fall off during extreme temperature changes. I lost a cam on a hot summer day because I trusted a suction cup that wasn't ready for the heat.
Routing the Power Cable Cleanly
This is the part that separates a professional-looking install from a messy one. The trick to a clean dash cam installation is hiding the power cable along the edges of your windshield and interior trim.
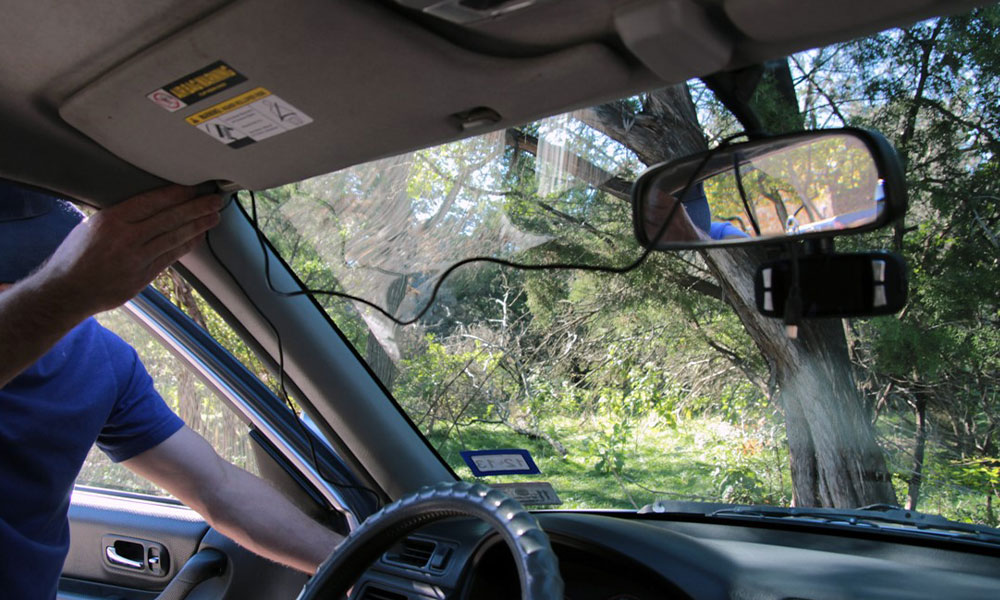
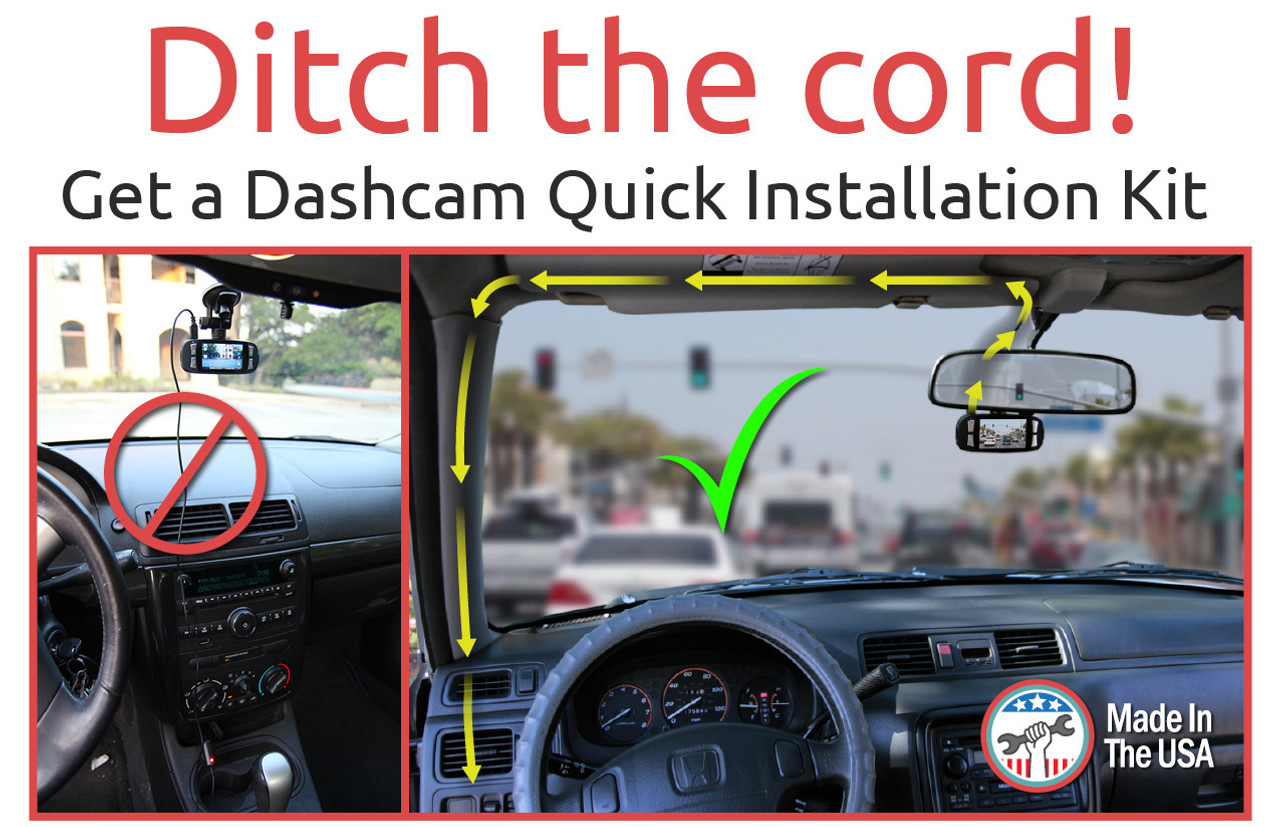
Start by plugging the power cable into the dash cam. Then run the cable straight up to the headliner, the fabric ceiling of your car. From there, you'll tuck the cable into the gap between the headliner and the windshield frame.
Continue routing the cable along the passenger side of the vehicle, following these steps:
- Tuck the cable into the headliner across the top of the windshield
- Bring it down the A-pillar on the passenger side
- Tuck it into the door seal along the dashboard
- Run it along the edge of the passenger footwell
- Bring it up to the center console or cigarette lighter port
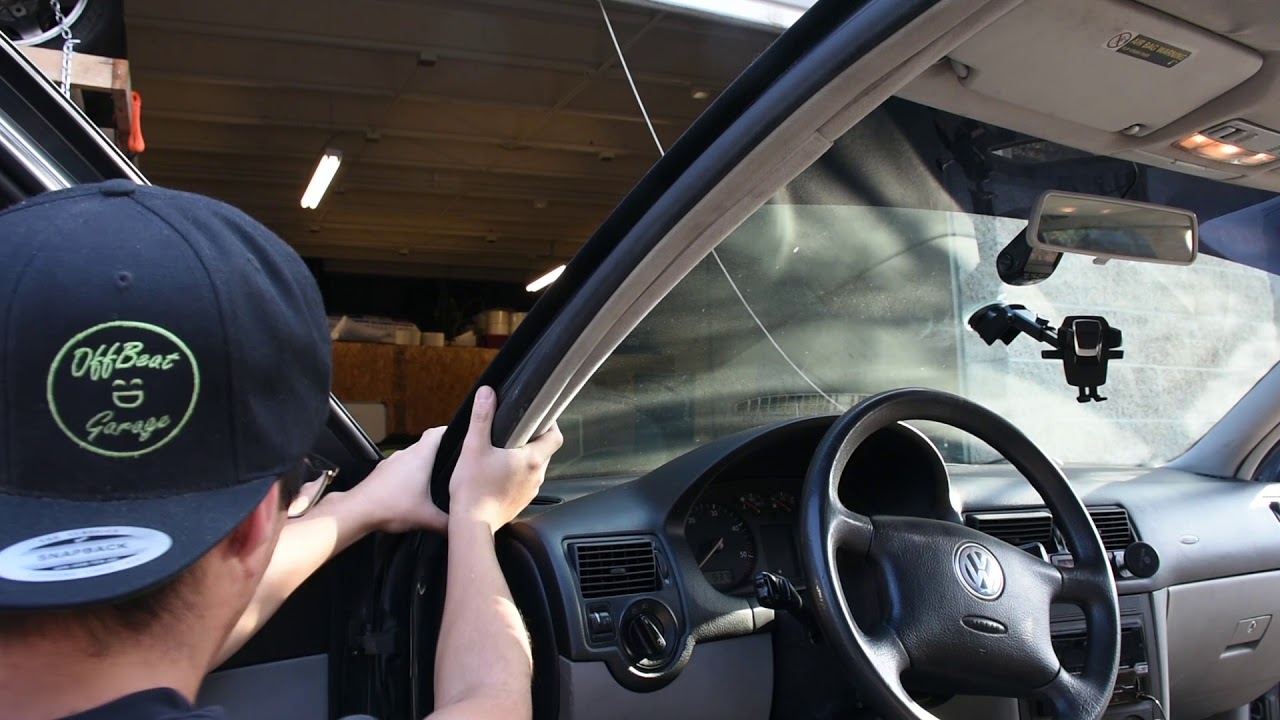
A small flat tool or trim removal tool makes this job ten times easier. Just press the cable into the gaps and it should hold itself in place. Most modern cars have enough space in the trim panels to hide the entire cable without it being visible.
When I did my first install, I tried to push the cable into the A-pillar too aggressively and actually popped a trim clip. Now I know to be gentle and let the natural gaps do the work.
Connecting to Power
Most dash cams come with a 12V car charger that plugs into your cigarette lighter or accessory port. This is the easiest way to power your cam and it works great for most drivers.
Simply plug the car charger into the 12V outlet and connect the other end to your dash cam. Many models will start recording automatically when the car turns on and stop when you turn the engine off.
If your cigarette lighter stays on even when the car is off, you might want to invest in a hardwiring kit. This connects the dash cam directly to your car's fuse box and usually includes a voltage monitor that prevents your battery from draining. Hardwiring is also the only way to enable parking mode on most dash cams, which keeps recording while your car is parked.
I've hardwired three different vehicles now, and while it sounds intimidating, it's actually very simple. The kit comes with clear instructions and most vehicles have easy-to-access fuse boxes. Just make sure to use the right fuse tap and ground the black wire to a metal bolt.
Setting Up Your Dash Cam Settings
Once everything is plugged in, take a few minutes to configure your dash cam settings. Most people skip this step and then wonder why their footage looks bad later.
Here are the key settings you should adjust right away:
- Resolution: Set it to 1080p or higher for clear footage
- Loop recording: Make sure this is enabled so you never run out of storage
- G-sensor sensitivity: Set to medium to avoid locking unnecessary files
- Date and time: Make sure this is correct for evidence purposes
- Parking mode: Enable this if you've hardwired the camera
- Audio recording: Decide if you want to record sound inside the car
A quick test drive is essential after setup. Check the footage on your phone or computer to make sure the angle is right and the image is clear. You don't want to find out your cam was pointing at the sky after an accident happens.
Common Mistakes to Avoid
Over the years, I've seen and made just about every mistake possible when installing dash cams. Here are the big ones to watch out for:
- Mounting too high or too low on the windshield
- Leaving the cable dangling across the dashboard
- Forgetting to format the microSD card before first use
- Using a cheap memory card that can't handle constant recording
- Blocking the driver's view of the road
- Not checking local laws about windshield obstructions
- Mounting over the windshield tint strip
The cheap memory card issue is one that trips up a lot of people. Regular microSD cards aren't designed for the constant write cycles of a dash cam. Always use a high-endurance card specifically rated for dash cam or security use.

Testing Your Installation
Before you call it done, do a proper test run. Drive around for 15 to 20 minutes in different conditions and review the footage carefully.
Check for the following:
- Image is clear and stable
- License plates are readable when close
- No excessive glare or reflections
- Audio is recording properly
- The camera doesn't vibrate or shift while driving
- Night footage is bright enough to see details
If anything looks off, now is the time to adjust the angle or reposition the mount. I always tell people to check the footage in the morning, afternoon, and evening because lighting changes everything.
Frequently Asked Questions
Do I need a professional to install a dash cam?
No, most people can install a dash cam themselves in under 30 minutes using the included 12V charger and basic tools. Professional installation is only recommended if you want a hardwired setup with parking mode.
Where should I put my dash cam for the best view?
The best spot is behind the rearview mirror on the passenger side, within the wiper sweep area. This gives you a clear view of the road without blocking your line of sight.
Can I install a dash cam without using the cigarette lighter?
Yes, you can hardwire a dash cam directly to your car's fuse box using a hardwiring kit. This gives you a cleaner look and enables parking mode features.
Is it hard to hide dash cam wires?
Hiding the wires is easier than most people think. You just tuck the cable into the headliner, run it down the A-pillar, and along the door seals. The whole process takes a few extra minutes but makes a huge difference.
Will a dash cam drain my car battery?
A standard dash cam plugged into the cigarette lighter won't drain your battery because it only runs when the car is on. If you hardwire it for parking mode, use a hardwiring kit with a voltage cutoff to protect your battery.
Conclusion
Installing a dash cam is one of the smartest things you can do for your vehicle, and the good news is you don't need to be a car expert to do it. With a little patience, a few basic tools, and about half an hour of your time, you can have a clean, professional-looking installation that protects you on every drive.
Take your time with the wire routing, pick the right memory card, and don't skip the test drive. Once you've done it once, you'll be able to install one in any car in record time. Stay safe out there, and happy driving.