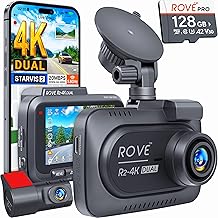
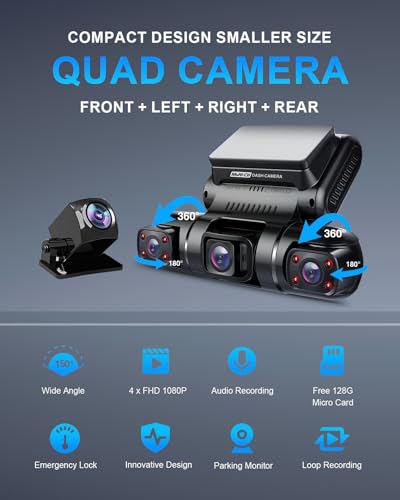
Ever hit a sudden pothole or swerve to avoid an accident, only to worry if your dash cam captured the critical moments? That's exactly where the G-sensor comes in. This little component acts like your dash cam's emergency alert system, designed to automatically protect the footage you might need most. Understanding what is a G-sensor on dash cam helps you appreciate its role in documenting incidents.
In essence, a G-sensor measures acceleration forces across its multiple axes. When these forces exceed a pre-set threshold, often due to an impact, the sensor triggers the dash cam to immediately lock and save the current video file. Manufacturer specifications commonly rate these sensors for detecting impacts of 3 Gs or more. This reliable detection system can be a crucial tool for drivers.
Image source: Pexels / Orhan Pergel (Pexels License)
Understanding the Dash Cam G-Sensor: The Basics
At its heart, a dash cam's G-sensor, short for gravitational sensor, is an accelerometer. It’s built to sense motion and physical shocks. Think of it like a tiny, sensitive pendulum or a specialized microchip that detects changes in speed and direction. This means it doesn't just register gravity; it measures changes in acceleration, especially sudden ones.

Image source: Pexels / Senne (Pexels License)
When your car experiences a jolt, like hitting a curb, a sudden stop, or, worse, a collision, the G-sensor registers this acceleration force. Most dash cams use a 3-axis G-sensor, meaning it can detect changes along the forward/backward (x-axis), left/right (y-axis), and up/down (z-axis) directions. When the detected force surpasses a sensitivity level you've set, it signals the dash cam to secure the footage. This often prevents the file from being overwritten during normal loop recording, acting as an automatic incident recorder.
Why Sensitive Readings Matter
The sensitivity of your dash cam's G-sensor is a big deal. It's not just a "on" or "off" switch; it's a dial that you can often adjust. This setting dictates how much force it takes to trigger that crucial file-locking mechanism. If it's set too low, even a car door slamming shut could trigger an event, filling up your storage with unnecessary locked files; this is also known as a false positive.
On the flip side, if the sensitivity is too high, the sensor might miss smaller but still important impacts, like a minor fender-bender or hitting a significant pothole. Finding that sweet spot is key to ensuring the sensor works reliably for genuine emergencies without constantly creating false alarms. This adjustment is a primary way you tailor the dash cam's automatic protection to your driving environment.
Key G-Sensor Features to Look For
When you're sizing up dash cams, pay attention to how the G-sensor is implemented. Beyond just having one, its adjustability and the clarity of its sensitivity settings are paramount. Some higher-end models might offer more granular control, allowing you to fine-tune each axis independently, while others offer a simple Low, Medium, High setting.
Image source: Pexels / AP Vibes (Pexels License)
Look for dash cams that clearly label these settings. Manufacturer specifications often detail the G-force levels the sensor is calibrated to detect for each setting. For instance, a "Low" setting might be triggered by 0.5 Gs, "Medium" by 1 G, and "High" by 2 Gs, though these specific values can vary greatly between brands. Understanding these options helps you pick a device that suits your driving habits and locale.
The Real Perks of Having a G-Sensor
So, why bother with a G-sensor? Its primary benefit is peace of mind, knowing that critical moments won't be lost. Imagine you're in an accident; the footage leading up to, during, and immediately after can be invaluable. The G-sensor ensures that this specific video segment is protected from being automatically deleted by the camera's loop recording function as the memory card fills up.
This automatic protection is vital for several reasons. It provides a clear, objective record of what happened, which is indispensable when dealing with insurance claims or potential legal disputes. It essentially acts as an eyewitness that never forgets and never lies. Having this reliable evidence can simplify post-incident processes significantly.
When a G-Sensor Can Cause Headaches
While incredibly useful, a G-sensor isn't without its potential frustrations. The most common issue drivers face is called a "false positive" trigger. This happens when the sensor is overly sensitive, or when you encounter significant road vibrations or bumps that, while not actual accidents, register as strong enough forces to lock a file.
Image source: Pexels / Orhan Pergel (Pexels License)
This constant recording of non-event files can quickly eat up storage space on your dash cam's memory card. Many dash cams have a limit on how many locked files they can store. Once that limit is reached, the camera stops recording new footage until you manually delete the locked files. This is inconvenient and can be avoided by judiciously setting the sensitivity.
Understanding G-Force Levels
Dash cam G-sensors measure instantaneous acceleration, often referred to as G-force. This force tells you how strong an impact or sudden movement was. A typical car G-force during a severe frontal collision can range from 30 to 70 Gs, according to biomechanical research. The G-sensor in your dash cam is designed to detect much lower forces, usually in the single digits, to trigger a recording.
Most dash cams allow you to adjust the sensitivity from low to high, impacting the G-force threshold needed to lock a file. For example, a setting of 1G means the sensor will lock the recording if it detects an acceleration event equivalent to one G, which is about the force of gravity itself. This helps differentiate a minor bump from a significant jolt and fine-tune the system's responsiveness without constant unwanted interruptions.
Dash Cam G-Sensor Use Cases
The G-sensor is a core feature for any driver concerned with documenting road events. It's particularly useful for ride-share drivers or professional fleet managers who need irrefutable evidence of any on-road incidents, whether accidental or intentional. These professionals often face a higher volume of potential disputes or claims, making reliable recording essential.
For private vehicle owners, it provides critical documentation in case of accidents, hit-and-runs, or even minor property damage. This captured evidence can support insurance claims, help identify a responsible party, or serve as proof if a dispute arises over fault. Even when parked, some dash cams use the G-sensor to detect impacts in parking mode, safeguarding against minor fender-benders that might occur when you're not present.
Who Needs a G-Sensor Most?
Drivers who frequently travel in heavy traffic, navigate unpredictable urban environments, or drive on poorly maintained roads will benefit greatly. Those involved in long-distance trucking or delivery services also rely on these sensors for incident logging. Essentially, anyone who wants an extra layer of security and an objective record of their journeys should consider a dash cam with a robust G-sensor.
Real-World Driving Scenarios
Imagine you're stopped at a red light, and the car behind you rear-ends you. Your dash cam, equipped with a G-sensor set to a medium sensitivity, instantly detects the impact. It automatically locks the current video file, protecting the footage of the collision and any preceding moments. This locked file is then saved separately, ensuring it's available for review without being overwritten.
Another scenario: you're driving on a highway and have to brake sharply to avoid debris that fell from a truck. The sudden deceleration is caught by the G-sensor, locking the footage. This can be helpful if you need to prove that your braking was sudden and unavoidable, especially if another vehicle was tailgating you.
Setting Up Your Dash Cam G-Sensor
Getting your dash cam's G-sensor set up correctly is generally straightforward, but it requires a bit of trial and error. Most dash cams have this setting accessible through the device's menu, either on-screen or via a companion smartphone app. You'll typically find options like "Low," "Medium," and "High," or sometimes a numerical scale representing G-force levels.
Adjusting Sensitivity for Your Needs
The best approach is to start with a medium sensitivity. Take a short drive and replicate common driving conditions. Pay attention to whether the dash cam indicates frequent file locking without a clear reason, like hitting a significant bump or a sudden, hard brake. If you're getting too many locked files that aren't actual incidents, dial the sensitivity down.
Conversely, if you feel it's not sensitive enough and might miss minor impacts, increase the sensitivity. Some advanced models may allow for per-axis adjustment, giving you even finer control. The goal is to have it trigger reliably for true impacts while minimizing false positives that clutter your memory card.
Choosing the Right Dash Cam
When you're in the market for a dash cam, the G-sensor is a feature that shouldn't be overlooked. While many cameras include one, the quality, adjustability, and reliability can vary significantly between models. Look for dash cams from reputable manufacturers that provide clear specifications about their G-sensor technology.
Comparing G-Sensor Performance Across Models
It's wise to check reviews and customer feedback specifically mentioning the G-sensor's performance. Some brands are known for highly accurate and well-calibrated sensors that strike a good balance between responsiveness and avoiding nuisance alerts. Others might have a reputation for being overly sensitive or entirely too blunt.
Consider the overall video quality, field of view, and additional features like GPS logging or parking mode capabilities, but don't let the G-sensor be an afterthought. A well-functioning G-sensor ensures that the most critical footage is automatically preserved, making the entire dash cam system more effective as a safety and evidence tool.