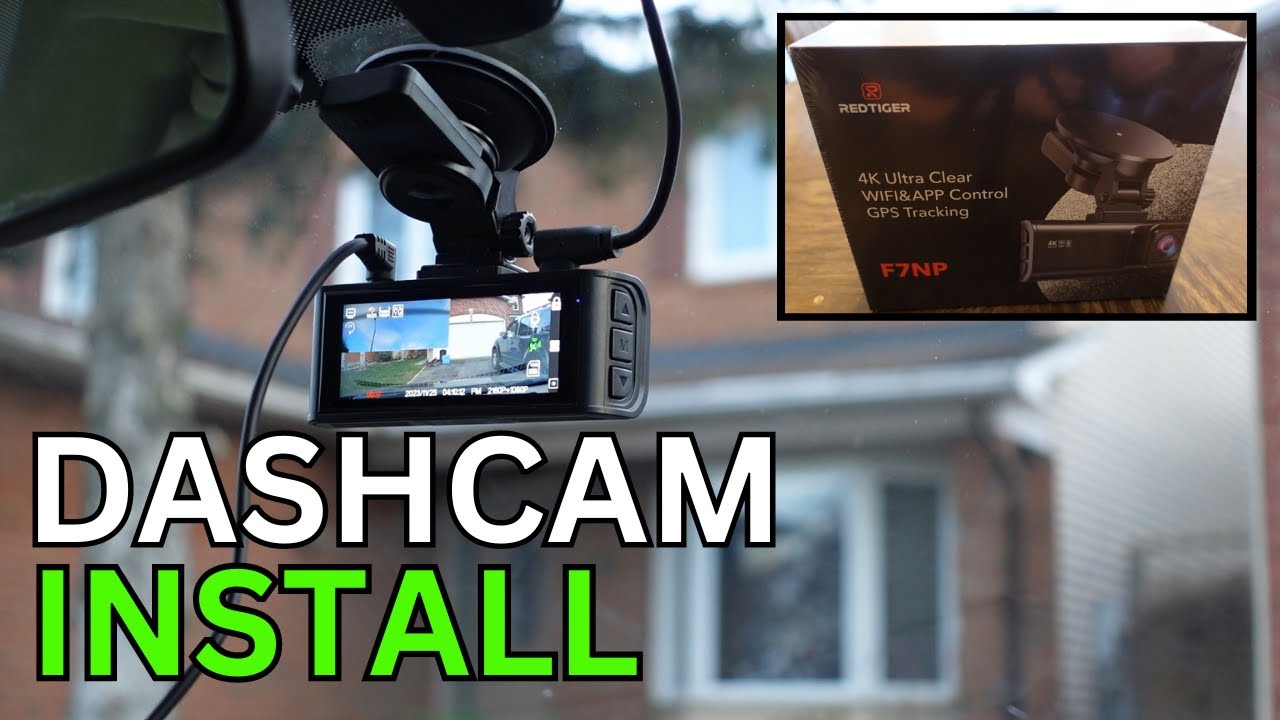
Installing a Red Tiger dash cam is a straightforward process that takes about 20 to 30 minutes with basic tools and a clean windshield. Most drivers complete the setup themselves using the included suction mount, cable clips, and a 12V car charger.
I have installed dozens of dash cams over the years, from budget models to premium 4K units, and Red Tiger consistently ranks among the easiest brands to set up. The hardware feels solid, the instructions are clear, and the mobile app makes pairing painless. In this guide, I will walk you through every step, share a few pro tips I learned the hard way, and help you avoid the common mistakes that trip up first-time installers. By the end, you will have a clean, professional-looking install that records reliably every time you drive.
What Comes in the Red Tiger Dash Cam Box
Before you touch your windshield, lay everything out and get familiar with the parts. Knowing each component makes the actual install much faster.
- The dash cam unit with a front-facing lens (and a rear camera if you bought a dual-channel model)
- A suction cup mount or adhesive mount, depending on the version you ordered
- A long USB power cable (usually around 11 to 13 feet)
- A 12V car charger adapter with a USB port
- Cable clips or adhesive cable holders for routing the wire
- A trim removal tool (plastic pry tool) for hiding wires
- A microSD card (sometimes included, sometimes sold separately)
- User manual and quick-start guide
Take 30 seconds to inspect each piece. I once jumped straight into mounting and later realized the microSD card slot was on the side, not the bottom, which changed how I positioned the camera. A quick look saves frustration later.
Tools You Will Need
Red Tiger designs its dash cams for DIY installation, so you do not need anything fancy. Here is what I keep in my glove box for installs.
- Microfiber cloth and glass cleaner for prepping the windshield
- A small Phillips screwdriver if your mount uses screws (most use a twist lock)
- The included plastic trim tool for tucking the cable into the headliner
- Optional: a 90-degree USB adapter if your 12V outlet sits at an awkward angle
- Optional: a hardwire kit if you want parking mode without using the cigarette lighter
A clean workspace matters more than fancy tools. Wipe down the area where the suction cup will sit. Dust and grease are the number one reason mounts fall off mid-drive.
Step 1: Choose the Right Mounting Location
Placement is everything. The best spot gives you a clear view of the road, stays within the wiper sweep zone, and does not block your line of sight.
Mount the camera behind the rearview mirror on the passenger side. This keeps it centered for recording but out of your direct eyeline. In most cars, this means about 1 to 2 inches below the headliner and slightly to the right of the mirror.
Legal note: some states have rules about where you can place objects on the windshield. Generally, the area swept by your wipers and within a 5-inch square in the lower corner of the driver side is fair game. Behind the mirror is almost always safe.
Step 2: Insert the MicroSD Card
Before you mount the camera, slide in the memory card. Red Tiger dash cams support cards from 32GB up to 256GB, and I recommend a high-endurance card rated for continuous recording. SanDisk High Endurance or Samsung PRO Endurance cards are my go-to choices.
Power off the camera, insert the card with the label facing the lens, and push until it clicks. Format the card inside the app or through the camera menu after the first power-up. This step prevents the "card error" messages that plague new users.
Step 3: Attach the Mount to the Windshield
Red Tiger gives you two mount options: suction cup or adhesive pad. The suction cup is reusable and great for test-fitting. The adhesive pad holds stronger in heat and cold but is one-time use.
Clean the glass with isopropyl alcohol, let it dry, then press the mount firmly against the windshield. For suction cups, flip the lever to lock it. For adhesive pads, hold pressure for 30 seconds and wait 24 hours before driving for the strongest bond.
I learned the hard way that mounting in direct sunlight makes adhesive pads cure unevenly. If you can, install in a shaded garage or during cooler hours.
Step 4: Connect the Power Cable
Routing the cable cleanly is what separates a professional install from a messy one. The goal is to hide the wire along the headliner, down the A-pillar, and into the 12V outlet.
Start by plugging the USB cable into the camera. Run the wire up into the headliner gap along the top of the windshield. Most headliners have a small channel where you can tuck the cable with your fingers or the trim tool.
Pull down the weatherstripping along the driver side door frame, tuck the cable behind it, and run it down toward the footwell. Route the wire along the side of the center console and plug it into the 12V outlet.
Leave a little slack near the camera so you can adjust the angle without straining the port. I always leave about 2 inches of extra cable up top, just in case.

Step 3 (for dual-cam models): Install the Rear Camera
If you bought a Red Tiger dual-channel dash cam, the rear camera installs on the back window. The process mirrors the front.
Clean the rear glass, mount the camera near the top center, and route the long rear cable along the headliner of the back window, down the C-pillar, and across to the front camera. Most rear cables are long enough to hide completely inside the trim panels.
Test the rear camera angle before you finish tucking wires. I have seen too many rear cameras pointed at the sky because someone skipped the test.
Step 4: Power On and Configure Settings
Plug in the 12V adapter and start your car. The camera should power on automatically and begin recording within a few seconds.
Download the Red Tiger app from the App Store or Google Play. Turn on Wi-Fi on the dash cam (usually a button on the side), connect your phone to the camera's Wi-Fi network, and open the app. From there you can preview the live view, adjust settings, and download clips.
Key settings to configure right away:
- Resolution: set to the highest your model supports (1080p, 1440p, or 4K)
- Loop recording: enable so older files overwrite when the card fills
- G-sensor sensitivity: medium is the sweet spot for most drivers
- Date and time stamp: turn on for legal evidence
- Parking mode: enable only if you hardwired the camera
Format the microSD card through the app after your first power-up. This creates the proper folder structure and reduces file corruption.

Common Mistakes to Avoid
Even experienced installers slip up on small details. Here are the errors I see most often and how you can sidestep them.
- Mounting too low: this blocks your view and catches more sun glare. Stay high and tight behind the mirror.
- Skipping the cable test: always power on the camera before tucking the entire wire. One bad connection means redoing the whole route.
- Using a cheap microSD card: regular cards fail under constant write cycles. Spend the extra $15 on a high-endurance card.
- Forgetting to format: a fresh card or a card from another device can cause recording errors until formatted in the camera.
- Blocking the GPS or ADAS sensors: some Red Tiger models have built-in GPS. Keep the mount clear of any metal tint strips at the top of the windshield.
- Ignoring the angle: the lens should point slightly downward, capturing about 60% road and 40% sky. Too much sky means blown-out footage in bright sun.
Tips for a Clean, Professional-Looking Install
A few extra minutes during installation pays off every time you drive. These are the tricks I use on every install to make it look factory-fitted.
- Use black electrical tape over cable clips for a seamless look on black trim
- Run the cable along existing wiring harnesses when possible
- Hide the 12V adapter inside the center console if your outlet is always on
- Label both ends of any extension cables if you add a hardwire kit
- Take a photo of your final wire route before you put the trim back, so you remember the path for future upgrades
Maintaining Your Red Tiger Dash Cam
A dash cam is not a "set it and forget it" device, but maintenance takes less than five minutes a month.
- Format the microSD card once a month to keep file systems healthy
- Clean the lens with a microfiber cloth whenever you wash your windshield
- Check the suction cup or adhesive pad every few weeks, especially in extreme temperatures
- Update the firmware through the app when notifications appear
- Review a random clip every couple of weeks to make sure audio and video still work
I keep a small microfiber cloth in my glove box and wipe the lens during every gas fill-up. It takes 10 seconds and makes a huge difference in footage clarity.
Hardwiring for Parking Mode (Optional Upgrade)
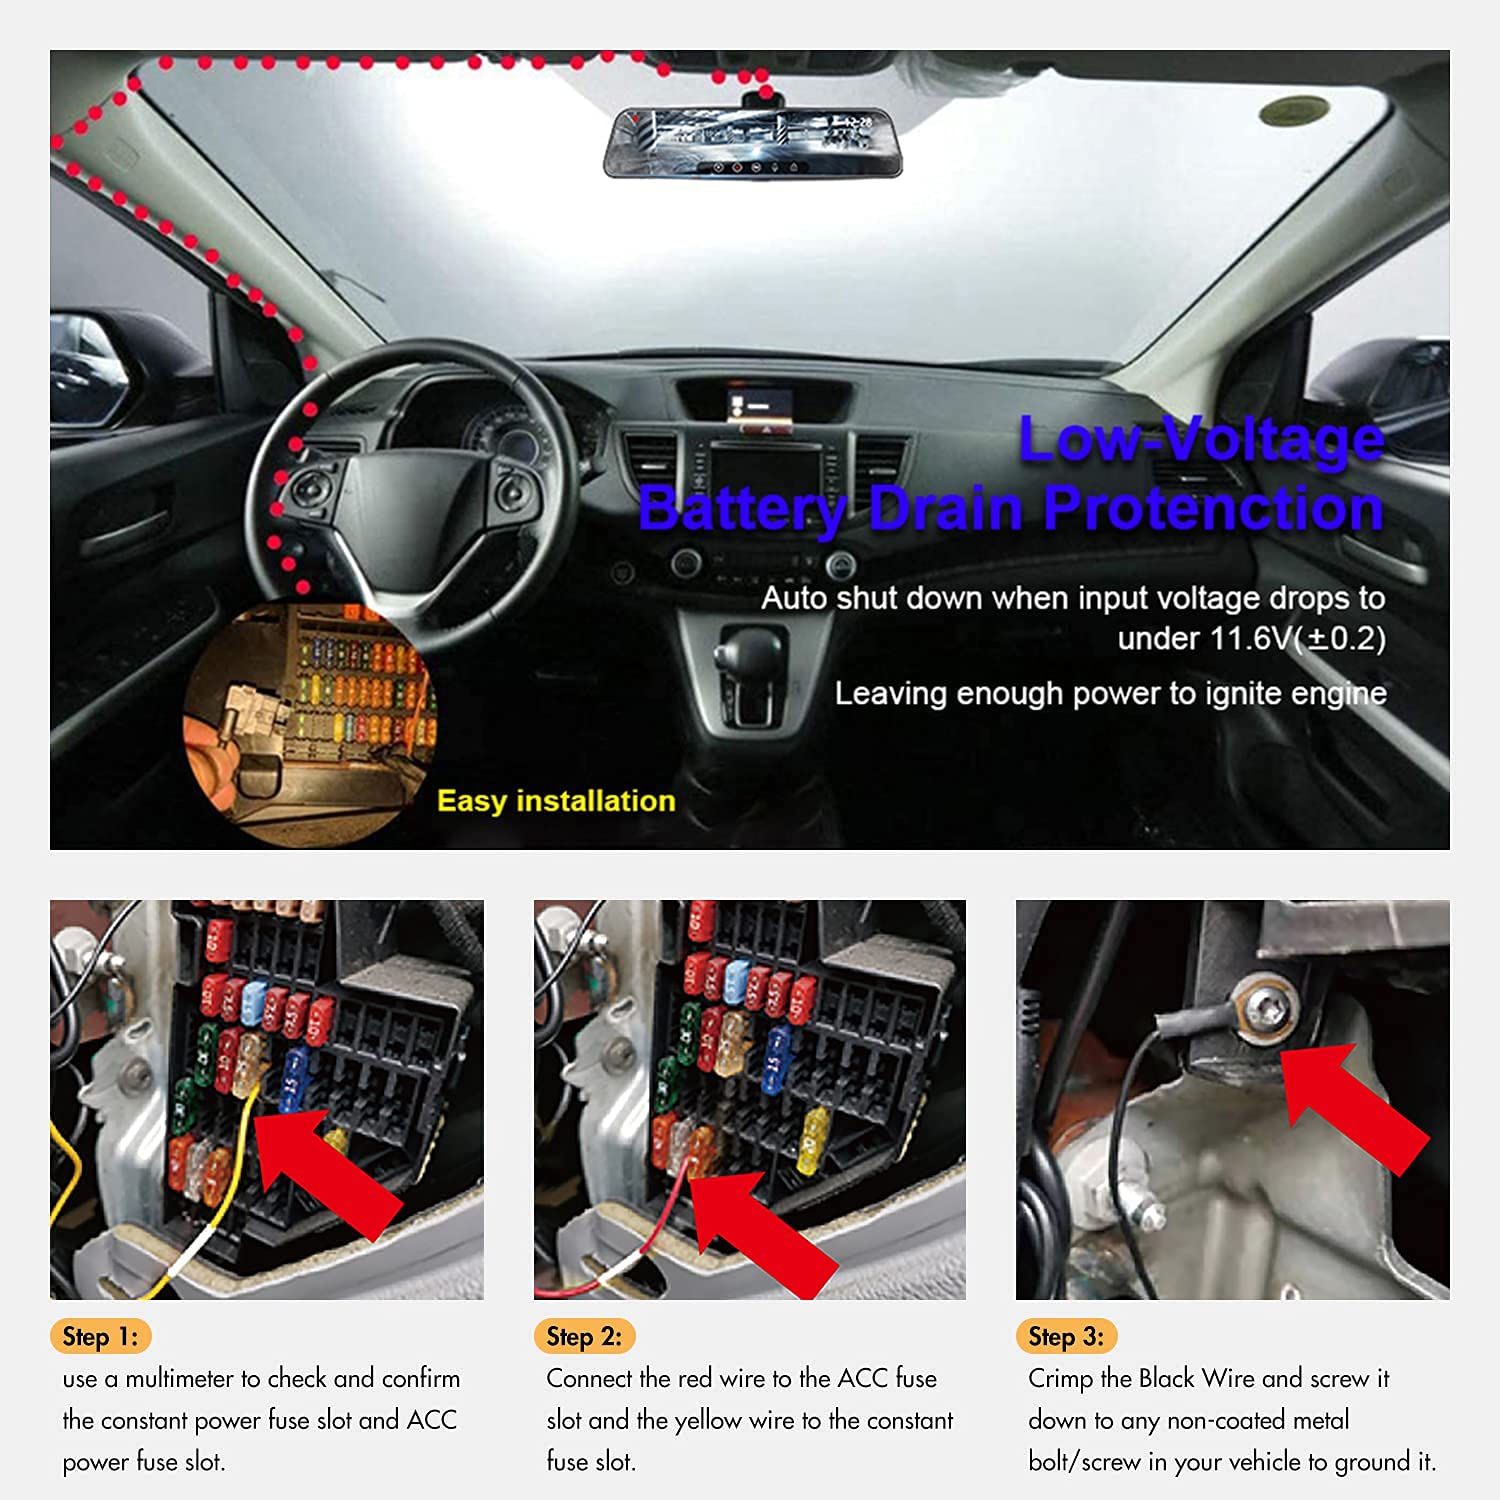
If you want your Red Tiger to record while the car is parked, you need a hardwire kit. This connects the camera directly to the fuse box and draws power even when the ignition is off.
The kit includes three wires: constant power, accessory power, and ground. You tap into a constant fuse (always on), an accessory fuse (on with ignition), and a metal bolt for ground. A add-a-fuse tap makes the connection clean and reversible.
Parking mode uses motion detection or impact triggers to save clips. It is a great feature for hit-and-runs in parking lots, but it does drain your battery over time. I recommend a battery pack like the Cellink NEO if you park for long periods.
Frequently Asked Questions
How long does it take to install a Red Tiger dash cam?
A basic front-camera install takes 20 to 30 minutes, including routing the cable. A dual-channel setup with a rear camera adds another 15 to 20 minutes for the second camera and its cable.
Do I need to hardwire my Red Tiger dash cam?
No, hardwiring is optional. The included 12V adapter works perfectly for recording while you drive. You only need to hardwire if you want parking mode or prefer a cleaner look without a cable hanging down to the outlet.
Will a Red Tiger dash cam drain my car battery?
When plugged into the 12V outlet, the camera only draws power while the ignition is on (in most cars). Hardwired setups can drain the battery if left in parking mode for days without driving. A dedicated dash cam battery pack eliminates this risk.
What size microSD card should I use with my Red Tiger?
Red Tiger recommends a Class 10 or U3 card between 32GB and 256GB. I personally use 128GB high-endurance cards, which hold roughly 16 to 20 hours of 1080p footage before looping over.
Can I install a Red Tiger dash cam myself, or should I go to a professional?
Most drivers can install a Red Tiger dash cam at home with no experience. The tools are simple, the instructions are clear, and there are no wires to cut for the basic setup. Professional installation is only worth it if you want parking mode with a hardwire kit and are not comfortable working near your car's fuse box.
Final Thoughts
Installing a Red Tiger dash cam is one of the best 30-minute upgrades you can make to your vehicle. You get peace of mind, reliable evidence in case of an accident, and a record of every scenic drive or unexpected moment on the road. The process is simple, the tools are basic, and the result looks clean when you take your time with cable routing. Start by picking the right spot behind your rearview mirror, prep the glass, and work the wire neatly into the trim. Once powered on, configure your settings, format the card, and you are ready to roll. Drive safe, and enjoy the extra layer of security every time you turn the key. If you found this guide helpful, share it with a friend who just bought their first dash cam, or drop a comment below with your own installation tips and tricks.