Mounting a black box dash cam is a simple DIY job that takes about 20 minutes with basic tools and a clean windshield. With the right placement, cable routing, and a little patience, you can get reliable, hands-free recording on your very first try.
If you've ever worried about hit-and-runs, unclear accident reports, or just want peace of mind on the road, installing a dash cam yourself is one of the smartest upgrades you can make. I'll walk you through every step the way I'd help a friend in their driveway, sharing the small mistakes I've made so you can skip them entirely.

What You'll Need Before You Start
Getting everything ready before you touch the car saves time and frustration. Think of this as your dash cam "mise en place."
- The dash cam unit (front, or front + rear if dual-channel)
- A microSD card (Class 10 or higher, 32GB–256GB)
- The included mounting bracket or adhesive pad
- A 12V car charger or hardwiring kit
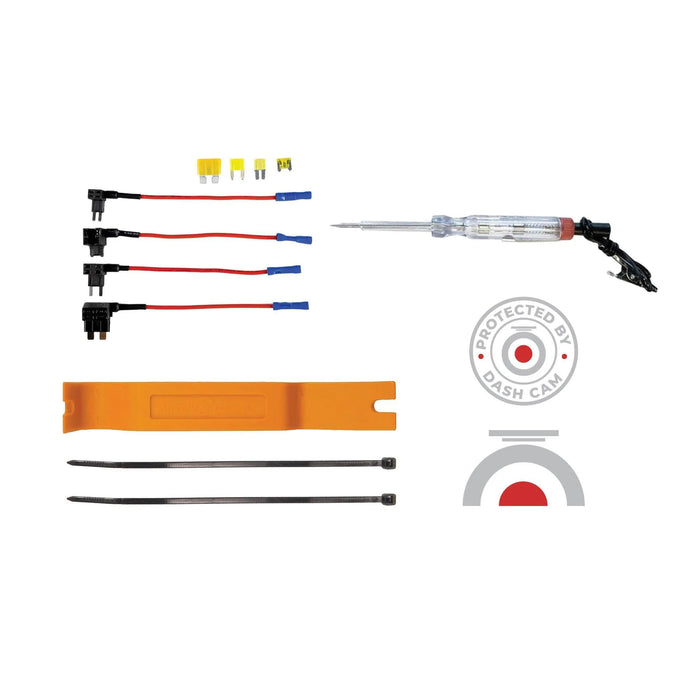
- A plastic trim tool (or a clean, old credit card)
- Microfiber cloth and isopropyl alcohol wipes
A quick tip from experience: always format the memory card inside the camera before the first use, even if it's new. I learned this the hard way after a corrupted card cost me an entire road trip's worth of footage.
Choosing the Perfect Mounting Location
Where you place the camera decides what you actually capture. The sweet spot is behind the rearview mirror, slightly offset to the passenger side so it doesn't block your view.
Good placement means:
- The lens sits within the windshield wiper's cleaning arc (so rain doesn't ruin the shot)
- It doesn't interfere with airbags or sun sensors
- The screen or status light is easy to glance at while driving
- It's high enough to capture a wide forward view of the road
In most sedans and SUVs, this is about 1–2 inches below the headliner and just to the right of the mirror. If your car has a blacked-out area near the mirror, use it, since the camera blends in and stays discreet.

How to Install a Black Box Dash Cam Step by Step
Now for the actual install. I'll break it into clear steps so you can follow along whether you're a complete beginner or a seasoned tinkerer.
Step 1: Prep the Windshield
Clean the mounting area with isopropyl alcohol and a microfiber cloth. Let it dry completely (about 60 seconds). Any dust or oil will weaken the adhesive and could cause the camera to fall on a hot day.
Step 2: Attach the Mount
If your camera uses a suction cup, moisten it lightly and press firmly against the glass, then twist the lock lever. For adhesive mounts, peel the backing, align carefully (you only get one shot), and press hard for 30 seconds.
Step 3: Mount the Camera
Slide the camera onto the bracket until it clicks. Then power it on temporarily to adjust the angle. Most cameras have a live view, so you can see exactly what it's recording. Aim it so the horizon sits in the middle of the frame, and you can see a sliver of the hood for reference.
Step 4: Route the Power Cable
This is the part that makes the install look professional. Here's the route I use on every car:
- Plug the cable into the camera
- Tuck it into the headliner gap with your trim tool
- Run it down the A-pillar (passenger side is safer since it's away from the driver's airbag path)
- Slide it along the door seal or under the glove box
- Drop it down to the 12V outlet or fuse box
A plastic trim tool is your best friend here. It prevents scratches and helps you push the cable into tight seams without forcing anything.
Step 5: Connect Power and Test
Plug the 12V adapter into your cigarette lighter socket or connect the hardwiring kit to the fuse box. Start the car. The camera should power on automatically and start recording within a few seconds.
Check the footage:
- Is the horizon level?
- Can you read license plates of cars directly in front at a stop?
- Is the time and date stamp correct?
If something's off, adjust now, before you button everything up.

Hardwiring Your Dash Cam for a Cleaner Look
If you want the 12V socket free or want parking mode (which records while the car is off), hardwiring is the way to go. It looks factory-clean and lets the camera draw power directly from the car's battery.
You'll need a hardwiring kit with three wires:
- Yellow (constant power) connects to a fuse that always has power
- Red (switched power) connects to a fuse that only has power when the ignition is on
- Black (ground) attaches to a metal bolt on the chassis
Most people use add-a-fuse taps to avoid cutting factory wiring. It takes an extra 15 minutes but feels incredibly satisfying when done. If you're not comfortable with the fuse box, a mechanic or car audio shop can do it for around $50.
Common Mistakes to Avoid When Installing a Dash Cam
Over the years, I've seen (and made) plenty of small errors that turned into big headaches. Here's what to watch out for:
- Mounting too low or too far to the side, which limits your field of view
- Routing the cable across the driver's side A-pillar where the airbag deploys
- Using a cheap or slow SD card that can't keep up with HD recording
- Forgetting to enable the date and time stamp, which makes footage useless in insurance claims
- Skipping the parking mode setting, which means you miss hit-and-runs in parking lots
One more: don't ignore your local laws. In some states, mounting anything on certain windshield areas is restricted. A quick search of your state's windshield obstruction laws takes two minutes and can save you a ticket.
Tips for Long-Term Dash Cam Performance
Installing it is just the start. A few habits will keep your camera running smoothly for years.
- Format the SD card once a month to prevent file corruption
- Check the adhesive mount every few months, especially in hot climates
- Update the camera's firmware when the manufacturer releases new versions
- Keep a spare SD card in the glove box in case the primary one fails
- Clean the lens gently with a microfiber cloth every few weeks
If your camera has a capacitor (most good ones do), it'll handle heat and cold better than battery-powered models. Still, on scorching summer days, parking in the shade can extend its life.
Frequently Asked Questions
How long does it take to install a black box dash cam?
A basic front-camera install using the 12V socket takes 15–25 minutes. Hardwiring and rear-camera setups add another 20–40 minutes depending on your car and experience level.
Can I install a dash cam myself without any experience?
Yes. Most drivers with zero technical background can handle a 12V plug-in install. Hardwiring requires basic comfort with a fuse box, but plenty of YouTube videos walk you through your specific car model.
Will a dash cam drain my car battery?
In parking mode, a hardwired dash cam can drain a weak or old battery over several days. Most modern hardwiring kits have a low-voltage cutoff that turns the camera off before the battery dies. If you don't drive often, consider a battery pack designed for dash cams.
Where should I not mount a dash cam?
Avoid placing it directly in the driver's line of sight, over airbags, or in areas that block windshield sensors used for automatic braking or lane assist. Stay within your state's legal mounting zones as well.
Do I need a special SD card for a black box dash cam?
Yes. Use a high-endurance microSD card rated for continuous recording. Regular cards wear out quickly under constant write cycles and often fail within a few months.
Final Thoughts
Installing a black box dash cam is one of those small projects that delivers outsized peace of mind. Once you've done it, you'll wonder how you ever drove without one. Take your time with the placement, route the cable cleanly, and don't skip the test footage, and you'll have a setup that works flawlessly for years.
If you found this guide helpful, drop a comment with your car model and I can share specific tips for your make and model. Safe driving, and enjoy that newfound confidence on the road.