Installing a dash cam front and rear is straightforward when you mount both cameras, route the rear cable along the headliner, and connect the power cable to your car's fuse box or a 12V socket.
I've been there — standing in my driveway with a tangle of wires, wondering if I should just pay someone to do it. After installing dash cams in everything from my old Honda Civic to my brother's brand-new truck, I can tell you this: it's one of those jobs that looks harder than it actually is. Once you understand the basic layout of your car and the path the wires need to take, the whole process clicks into place. A front and rear dash cam setup gives you full coverage on the road, protects you in hit-and-run situations, and captures footage that can save you thousands in insurance disputes. Let me walk you through the entire process the way I wish someone had walked me through it on my first install.

What You'll Need Before You Start
Before you touch a single wire, take ten minutes to gather everything. Nothing kills momentum like running back inside to grab a forgotten tool mid-install.
Most dash cam kits come with the basics, but here's the full list:
- Front dash cam unit with mount (usually suction cup or adhesive)
- Rear camera unit with mounting hardware
- Main power cable (long enough to reach your fuse box or 12V outlet)
- Rear camera connection cable (often 16–20 feet)
- MicroSD card (Class 10 or higher, 32GB minimum)
- Trim removal tool (plastic, not metal)
- Microfiber cloth and rubbing alcohol
- Zip ties or adhesive cable clips
- Fuse tap kit (if hardwiring)
- Multimeter (optional, but helpful)
Quick tip from my own mistake: don't skip the rubbing alcohol. I once mounted a camera on a dusty windshield, and it fell off during my first drive. Clean the glass first, every time.
Choosing the Right Dash Cam for Your Vehicle
Not every dash cam works the same way in every car. The shape of your windshield, the position of your rear window, and your power source all matter.
Front camera placement options include behind the rearview mirror (most discreet), the passenger side of the windshield, or centered near the top. Rear cameras typically mount at the top of the rear windshield, just below the brake light area for exterior mounts, or inside the rear window for sedan-style installs.
If you drive a truck or SUV with a vertical rear window, look for a rear camera with a wider field of view. For sedans, the standard 130–170 degree lens works perfectly.
Consider these features when shopping:
- Resolution: 1080p minimum, 1440p or 4K preferred for license plate clarity
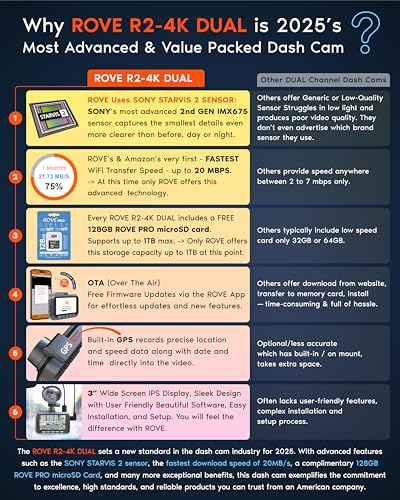
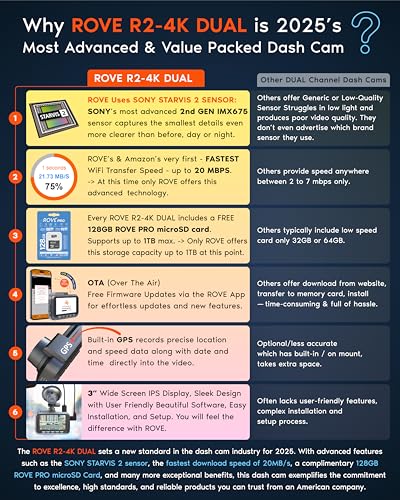
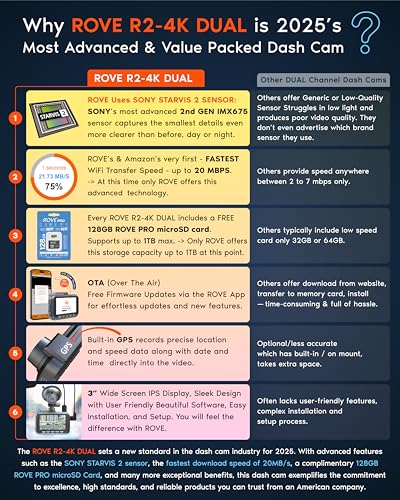
- Night vision: Look for Sony STARVIS sensors or similar low-light tech
- Parking mode: Requires hardwiring to your car's battery
- Capacitor vs battery: Capacitors handle heat better, especially in summer
- Wi-Fi or app connectivity: Makes reviewing footage way easier
Preparing Your Vehicle for Installation
A little prep work goes a long way. Park your car in a shaded area, turn off the engine, and pop the hood if you plan to hardwire. Open all the doors you need and roll down the windows slightly to help with cable routing.
Clean both the front and rear windshields where the cameras will sit. Use rubbing alcohol on the microfiber cloth to remove any wax, dust, or oily residue. Let it dry for a minute before mounting anything.
Take a moment to plan your cable path. The goal is to hide every wire so it doesn't dangle across your dashboard or hang down from the headliner. Most cars have a natural channel along the A-pillar, headliner, and door seals that you can use without any modification.
Step-by-Step Front Dash Cam Installation
The front camera is the brain of the whole system, so let's get it set up first.
- Mount the front camera on the windshield, ideally behind the rearview mirror and slightly to the passenger side. This keeps it out of your line of sight and avoids obstructing the driver's view.
- Make sure the lens is centered and the camera sits level with the road.
- Press the mount firmly against the glass for 30 seconds to activate the adhesive, or lock the suction cup lever.
- Attach the power cable to the camera and let the wire hang loose for now.
A personal note here: I always mount slightly to the right of the rearview mirror. In the US, the driver sits on the left, so a center mount can sometimes catch the sun's glare at certain times of day. Passenger-side placement avoids that and keeps the camera discreet.
Routing the Power Cable to the Front Camera
Now comes the part that intimidates most people: hiding the wire. But it's honestly just tucking and pressing.
- Start at the camera and tuck the cable into the headliner along the edge of the windshield.
- Use your trim tool to gently press the wire into the gap between the headliner and the A-pillar.
- Continue down the A-pillar, following the existing wire channels. Most cars have a small gap where the trim meets the frame.
- Route the cable down toward the dashboard edge, then either across to a 12V outlet or down toward the fuse box.
Avoid running the cable across the airbag area in the A-pillar. In some vehicles, the side curtain airbag deploys from this exact spot, and a wire in the wrong place can interfere with deployment. Most modern cars have a clip or channel that keeps wires behind the airbag path — use it.
How to Install a Rear Dash Cam
The rear camera follows the same principle, but the cable run is longer and requires more careful routing.
- Mount the rear camera at the top center of the rear windshield, or on the exterior near the license plate if your kit includes an external unit.
- Connect the rear camera cable to the front unit (or to a separate power source, depending on your model).
- Tuck the cable into the headliner at the rear of the car, working your way forward.
- Run the wire along the headliner edge, above the doors, all the way to the front camera.
- Use the trim tool to press the wire into the rubber door seals at each door jamb.
- Once you reach the front, connect the cable to the front dash cam.
On my own sedan, I ran the rear cable above the rear windshield, tucked it into the headliner, ran it along the passenger side, and dropped it down behind the glove box to meet the front camera. The whole wire is invisible once you're sitting in the car.
Hardwiring vs Plugging Into the 12V Outlet
You have two main options for powering your dash cam: the simple 12V socket route or a hardwired connection to the fuse box.
The 12V outlet method is faster and reversible. You just plug the cable in and you're done. The downside is that the outlet only works when the car is on (unless you have a constant-power outlet), and you lose the use of that socket for other things.
Hardwiring gives you always-on power, which enables parking mode. It also frees up your 12V outlet and creates a cleaner, more permanent installation. You'll need a fuse tap that matches your fuse box type (ATO, mini, or micro), and you should connect the red wire to a switched fuse (turns on with ignition) and the yellow wire to a constant fuse (always on).
If you're not comfortable identifying fuse types, look up your vehicle's fuse box diagram online or in the owner's manual. A switched fuse is often labeled "radio" or "cigarette lighter," while a constant fuse might be labeled "interior light" or "clock."
Connecting to Power and Testing the System
Once your cables are routed, it's time to connect power and test everything.
- If using a 12V outlet, plug in the cable and turn the car to ACC or ON.
- If hardwiring, connect the ground wire to a bare metal bolt near the fuse box, then insert the fuse tap into the appropriate slot.
- Turn on the car and check that both cameras power up.
- Adjust the camera angles so the front view shows the road ahead with a bit of sky and hood, and the rear view shows the road behind clearly.
- Insert a formatted microSD card and do a test recording.
I always do a short test drive after installation. It helps me confirm the angles are right, the cables stay tucked during driving, and both cameras record properly. There's nothing worse than finishing an install only to find the rear camera was pointing at the sky the whole time.
Common Installation Mistakes to Avoid
After helping friends with their installs, I've seen the same handful of mistakes pop up again and again. Save yourself the headache by steering clear of these:
- Mounting too low: The wiper blade sweep should cover the area where the camera sits, or rain will block the lens.
- Skipping the cable test: Always power up the system before tucking all the wires. It's much easier to fix a problem when the cable is still loose.
- Ignoring the airbag path: Never run wires in front of or directly across an airbag deployment zone.
- Using cheap SD cards: Dash cams write a lot of data constantly. A high-endurance card rated for continuous use will last years longer than a budget option.
- Forgetting to format the card: Most cameras need a fresh format to start recording properly. Do this once a month to keep the card healthy.
Tips for a Cleaner, Longer-Lasting Installation
Once you've done a few installs, you start picking up little tricks that make a big difference.
Use adhesive cable clips every 12–18 inches along the cable run. They keep wires from sagging over time, especially in hot weather when the headliner expands.
If you live somewhere with extreme heat, consider a dash cam with a supercapacitor instead of a lithium battery. I learned this the hard way when my first camera's battery swelled up after a summer in Arizona.
For the rear camera, angle it slightly downward so it captures more of the road and less of the sky. This makes license plates and vehicle details easier to read in your footage.
Finally, label your cables. If you ever need to remove the system or troubleshoot, having a small piece of tape on each end of the rear camera cable saves a lot of guessing.
Frequently Asked Questions
How long does it take to install a front and rear dash cam?
For a first-timer, plan on 1.5 to 2 hours for the full installation. If you're only using a 12V outlet and don't need to hide every wire, you can finish in about 30 minutes. Hardwiring adds another 20–30 minutes depending on your fuse box access.
Can I install a dash cam without drilling or hardwiring?
Yes. You can use the 12V cigarette lighter socket for power and adhesive mounts for both cameras. The only downside is that you lose parking mode and the cable will be visible unless you tuck it carefully into the trim.
Where should the rear dash cam be mounted?
For most sedans and SUVs, the top center of the rear windshield works best. For trucks or vehicles with a rear barn door, mounting just above the license plate or on the exterior third brake light housing gives a cleaner view of the road behind.
Do I need a special SD card for a dash cam?
Yes, use a high-endurance microSD card designed for continuous recording. Brands like SanDisk High Endurance, Samsung PRO Endurance, or similar models handle the constant read/write cycle much better than standard cards.
Will installing a dash cam void my car warranty?
In most cases, no. Dash cams are considered aftermarket accessories and don't typically affect powertrain or bumper-to-bumper warranties. However, if you hardwire and damage the electrical system during installation, that specific repair might not be covered.
Wrapping Up Your Dash Cam Install
Installing a front and rear dash cam is one of the smartest upgrades you can make for any vehicle. It protects you in accidents, captures evidence in hit-and-runs, and gives you peace of mind every time you park. Once you understand the basic layout of your car and the path the wires need to take, the whole project takes just a couple of hours with basic tools.
Take your time with the cable routing — that's what separates a professional-looking install from a messy one. Plan your path, tuck carefully, and test as you go. Before you know it, you'll have a clean, fully functional dash cam system that looks like it came from the factory.
If you found this guide helpful, drop a comment below with your own install experience or any questions you ran into along the way. And if you want more tips on car tech, driving safety, or accessory installs, stick around — there's plenty more where this came from.