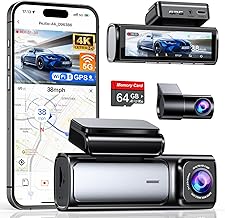
Hardwiring a VIOFO dash cam means connecting it directly to your car’s fuse box for continuous power, even when the ignition is off. It’s the cleanest, most reliable way to power your dash cam and unlock features like parking mode without leaving cables dangling across your dashboard.
If you’ve been thinking about hardwiring your VIOFO but feel a little nervous about touching your car’s electrical system, you’re not alone. I’ve been there too, staring at the fuse box, wondering if I’m about to make a costly mistake. The good news is that with the right hardwire kit, a few basic tools, and a clear step-by-step plan, anyone can do it safely. In this guide, I’ll walk you through the entire process the same way I’d help a friend in their driveway, sharing what I’ve learned from doing it myself several times.

Why Hardwire a VIOFO Dash Cam
Hardwiring your VIOFO dash cam isn’t just a neat way to hide cables. It actually changes how the camera works and how useful it is day to day.
When you plug a dash cam into a 12V outlet, the camera only gets power when the car is running. Hardwiring connects the camera directly to the car’s electrical system, usually through the fuse box. This lets the camera draw constant power so it can run features like parking mode, time-lapse recording, and motion detection even when you’re away from the car.
From my own experience, the biggest benefit is peace of mind. I once had someone bump my parked car in a grocery store lot, and the hardwired VIOFO caught the whole thing on parking mode. Without hardwiring, that footage simply wouldn’t have existed.
Hardwiring also frees up your 12V outlet for other things, like charging your phone, and it keeps your dash cam running even in extreme heat or cold when some cigarette lighter sockets cut power to save the battery.
What You’ll Need Before You Start
Before you start pulling panels off your car, gather everything you need. Having the right tools on hand makes the job smoother and safer.
Here’s what you typically need to hardwire a VIOFO dash cam:
- A VIOFO-compatible hardwire kit, usually a 3-wire kit with ACC, B+, and GND wires
- Add-a-fuse taps or fuse holders that match your car’s fuse type (mini, micro, or standard)
- A fuse puller or small needle-nose pliers
- A multimeter to identify fuse slots and test connections
- Trim removal tools or a small flat-head screwdriver
- Zip ties for securing wires
- A car manual or fuse box diagram
- Optional: a circuit tester to confirm fuse polarity
VIOFO makes its own hardwire kit, which is what I usually recommend because it’s designed to work with the camera’s voltage cutoff settings. Third-party kits can work, but you risk improper voltage monitoring, which can drain your battery if it’s not set correctly.
Understanding the VIOFO Hardwire Kit
The VIOFO hardwire kit has three wires, and each one plays a specific role in keeping your dash cam powered safely.
- Red wire (B+): Connects to a constant fuse that always has power, even when the car is off
- Yellow wire (ACC): Connects to an accessory fuse that only has power when the ignition is on
- Black wire (GND): Connects to a grounding point, usually a metal bolt on the car frame
The kit also has a small voltage regulator box that monitors your car’s battery voltage. If the voltage drops below a set threshold, the dash cam shuts off automatically to prevent your battery from dying. This is one of the most important features, and it’s why I always recommend the VIOFO-branded kit.
Knowing what each wire does helps you avoid common mistakes, like wiring the ACC and B+ to the same fuse, which can confuse the camera and cause parking mode to fail.
How to Choose the Right Fuse Slots
Picking the right fuse slots is the step that trips up most beginners. The goal is to find one constant and one accessory fuse that match the dash cam’s power needs.
A VIOFO dash cam typically pulls around 1 to 2 amps, so you don’t need a high-amperage fuse. Look for empty fuse slots or low-amperage fuses that control non-critical features like the rear wiper, radio, or interior lights.
Here’s a simple way to test which fuse is which:
- Turn the car off and use a multimeter to check for power on the fuse
- A constant fuse will show around 12V even with the car off
- Turn the key to ACC or start the car and test again
- A fuse that only shows power when the car is on is an accessory fuse
In my experience, the easiest spot is usually the fuse box on the driver’s side dash or under the hood. Toyota, Honda, and Ford vehicles all have accessible fuse boxes with plenty of open slots.

Step-by-Step Guide: How to Hardwire a VIOFO Dash Cam
Now that you understand the tools and the basics, let’s walk through the actual installation. Take your time, especially the first time you do it. Once you’ve done one, the second install will feel like a breeze.
Step 1: Plan the Wire Route
Before touching any wires, plan where the dash cam will sit and how the cable will travel from the camera to the fuse box. Most people mount the dash cam behind the rearview mirror to keep it out of sight.
Tuck the cable along the headliner, down the A-pillar, and into the kick panel area where the fuse box usually lives. Avoid routing the cable across airbag paths. The side curtain airbag runs along the A-pillar, so tuck the wire behind it, not in front of it.
I like to leave a little slack near the camera so I can adjust the angle without pulling on the wire.
Step 2: Locate Your Fuse Box
Your car usually has more than one fuse box. The most common location for dash cam hardwiring is the interior fuse box, which is often on the driver’s side near the footwell or under the dashboard. Some vehicles also have one under the hood.
Check your car’s manual for the exact location. You’ll also find a fuse diagram on the inside of the fuse box cover that lists which fuses control which features.
Step 3: Identify Constant and Accessory Fuses
Using your multimeter, identify a constant fuse and an accessory fuse. A constant fuse provides power at all times, while an accessory fuse only provides power when the ignition is on.
Make sure both fuses are rated appropriately for the dash cam. A 5A to 10A fuse is usually safe. Avoid using high-amperage fuses that control critical systems like airbags or the engine control unit.
Step 4: Connect the Hardwire Kit
Now it’s time to make the actual connections. You’ll use add-a-fuse taps to connect the VIOFO hardwire kit to the fuse box.
- Connect the red B+ wire to a constant fuse slot using an add-a-fuse tap
- Connect the yellow ACC wire to an accessory fuse slot using another add-a-fuse tap
- Connect the black GND wire to a nearby metal bolt or grounding screw
Make sure the add-a-fuse taps are inserted in the correct orientation. The wire from the hardwire kit should connect to the side of the tap that faces the fuse, not the power source. This protects the camera in case of a short circuit.
Step 5: Test the Connection
Before tucking everything back into place, test the dash cam to make sure it powers on and switches between modes properly.
- Start the car. The dash cam should turn on automatically
- Turn the car off. The dash cam should stay on in parking mode for a few seconds before shutting down
- If the camera behaves as expected, you’re good to go
If the camera doesn’t switch to parking mode, double-check the ACC and B+ connections. Swapping them is one of the most common mistakes.
Step 6: Secure and Tuck the Wires
Once everything works, tuck the wires neatly into the headliner, A-pillar, and kick panel. Use zip ties to secure the voltage regulator box in a place where it won’t rattle or get pinched.
Replace the fuse box cover and any trim pieces you removed. Take a step back and admire the clean install. No dangling cables, no occupied 12V outlet, and full parking mode protection.

Common Mistakes to Avoid When Hardwiring a VIOFO Dash Cam
Even experienced DIYers make mistakes. Here are a few things I’ve learned the hard way so you don’t have to.
- Connecting ACC and B+ to the same fuse: This will prevent parking mode from working correctly
- Using the wrong fuse rating: A fuse rated too high can cause electrical damage if something shorts
- Skipping the voltage cutoff setting: Set the voltage cutoff in the VIOFO app or menu to match your car’s battery type
- Routing wires across airbag zones: Always tuck wires behind airbags, not over them
- Not testing before reassembling: Always test the camera before putting panels back
Tips for a Cleaner, Safer Install
If you want your install to look like a professional did it, a few extra steps go a long way.
- Use fabric tape instead of zip ties on visible wires for a cleaner look
- Mount the voltage regulator in a spot with airflow to prevent overheating
- Label your add-a-fuse taps so you remember which fuse is which later
- Set the parking mode timer or voltage cutoff based on how often you drive
I usually set my VIOFO to 11.8V cutoff for a lead-acid battery and 12.0V for an AGM battery. This gives me plenty of parking mode time without risking a dead battery.
What Happens If You Don’t Hardwire
Skipping hardwiring isn’t the end of the world, but it does come with trade-offs. Without hardwiring, your dash cam will only record while you drive. That means no parking mode, no surveillance when you’re away, and no protection against hit-and-runs or vandalism.
A 12V outlet also cuts power the moment you turn the car off, so the camera can’t capture anything that happens after you walk away. For most drivers, especially rideshare drivers or anyone who parks in busy lots, hardwiring is the only way to get full protection.
Frequently Asked Questions
Can I hardwire a VIOFO dash cam myself?
Yes, most people can hardwire a VIOFO dash cam with basic tools and a little patience. If you’re comfortable identifying fuses and routing cables, it’s a straightforward DIY job that usually takes 30 to 60 minutes.
Will hardwiring a VIOFO dash cam drain my battery?
The VIOFO hardwire kit has a built-in voltage regulator that shuts off the camera if your battery voltage drops too low. As long as you set the correct voltage cutoff, your battery will stay protected.
Which fuse should I use for the VIOFO hardwire kit?
Use a constant fuse for the red B+ wire and an accessory fuse for the yellow ACC wire. Both should be low-amperage fuses that control non-critical features like the radio or interior lights.
Can I use any hardwire kit with a VIOFO dash cam?
Technically yes, but the VIOFO-branded hardwire kit is designed to match the camera’s voltage requirements. Third-party kits may not regulate voltage correctly, which can shorten battery life or damage the camera.
Is hardwiring a dash cam safe for my car’s electrical system?
Yes, when done properly, hardwiring is completely safe. Using add-a-fuse taps and the correct fuse ratings protects your car’s electrical system, and the voltage cutoff prevents battery drain.
Final Thoughts
Hardwiring your VIOFO dash cam is one of the best upgrades you can make for your car’s safety and security. It unlocks parking mode, frees up your 12V outlet, and gives you 24/7 protection without the clutter of cables.
The process might feel intimidating the first time, but once you understand the three wires, the fuse box layout, and the importance of testing before final assembly, it becomes a very manageable project. Take your time, follow the steps, and double-check your connections. You’ll end up with a clean, professional-looking install that works reliably every time you turn the key.
If you’ve been on the fence, grab the VIOFO hardwire kit, set aside an afternoon, and give it a try. Once you see your dash cam protecting your car even while it’s parked, you’ll wonder how you ever lived without it. And if you have questions or want to share your own install story, drop a comment below. I’d love to hear how it went.