Installing a dash cam is a simple DIY process: mount it behind your rearview mirror, route the power cable along the headliner and door seal, and plug it into your car's 12V outlet or hardwire it to the fuse box for a cleaner look. With a few basic tools and about 30 minutes, you can have a fully functional dash cam recording your drives without paying for professional installation.
I've installed over a dozen dash cams in everything from compact sedans to full-size trucks, and I can tell you firsthand that the process is far less intimidating than most people think. Whether you're protecting yourself against hit-and-run drivers, capturing scenic road trips, or just wanting peace of mind in a parking lot, a properly installed dash cam is one of the smartest upgrades you can make to your vehicle. In this guide, I'll walk you through every step of the process, share the little tricks I've learned along the way, and help you avoid the common mistakes that can lead to shaky footage, dangling wires, or even damage to your car's interior.

What You'll Need Before You Start
Before you drill, stick, or tuck any wires, let's make sure you have the right tools and accessories on hand. Having everything ready before you begin turns a potentially frustrating job into a smooth, 30-minute project.
- Dash cam unit (front, front + rear, or 360-degree depending on your needs)
- MicroSD card (Class 10 or higher, usually 32GB to 256GB)
- Mounting bracket or adhesive pad (usually included with the cam)
- Power cable (12V cigarette lighter plug or hardwire kit)
- Cable routing tools: plastic trim remover, tweezers, or a stiff credit card
- Microfiber cloth and isopropyl alcohol for cleaning the windshield
- Optional: fuse tap, add-a-circuit kit, or OBD-II power adapter
A quick tip from experience: don't cheap out on the microSD card. I've seen more dash cam failures caused by bad memory cards than by anything else. Get a high-endurance card specifically designed for continuous recording, like the SanDisk High Endurance or Samsung PRO Endurance line. Regular cards wear out fast under the constant write cycles of a dash cam.
Choosing the Right Mounting Location
Picking the right spot for your dash cam is more important than most people realize. A bad location can block your view, attract thieves, or produce shaky, useless footage.
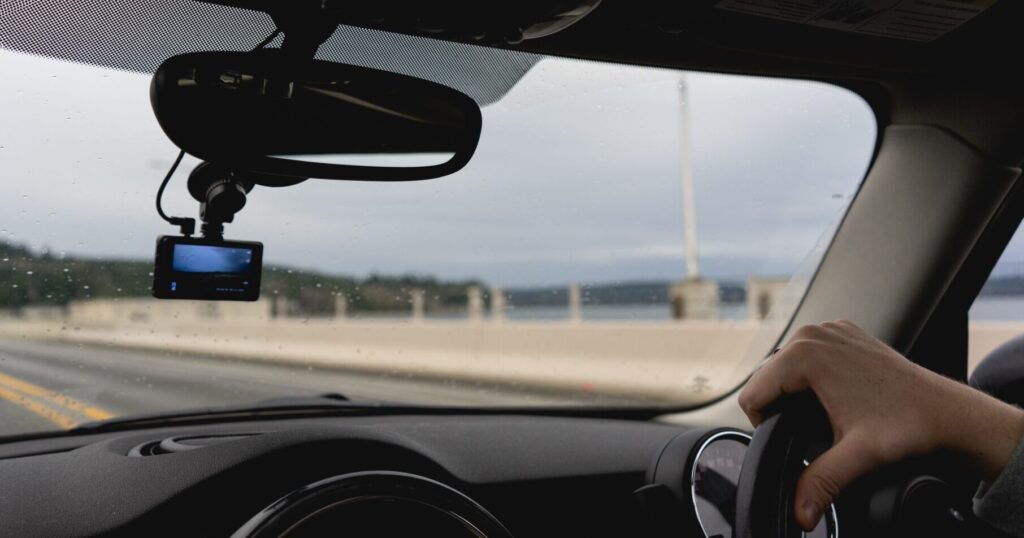
The sweet spot is just behind or beside your rearview mirror, on the passenger side. This keeps the camera out of your line of sight while still capturing a wide, unobstructed view of the road. In most states and provinces, this position is perfectly legal because the device doesn't obstruct the driver's view.
Things to keep in mind when choosing your spot:
- Stay within the windshield wiper's sweep zone for a clear view in rain or snow
- Avoid placing it over any tint strips or dotted areas at the top of the glass
- Make sure it's not in the airbag deployment path if your windshield has sensors
- Leave enough room to access the SD card and buttons without straining
– Keep it away from heated windshield elements that could interfere with the mount
If you're mounting a rear camera as part of a dual system, center it high on the rear windshield, near the brake light, and angle it slightly downward to capture the road behind you.
Preparing the Windshield
A clean mounting surface is the difference between a dash cam that stays put for years and one that falls off during your first hot day. I learned this the hard way when one of my early mounts slid down the windshield on a summer road trip and recorded nothing but my dashboard for three hours.
Follow these steps to prep the glass:
- Park in a shaded, cool area so the adhesive bonds properly
- Clean the chosen area with isopropyl alcohol and a microfiber cloth
- Let it dry completely (about 60 seconds is usually enough)
- Avoid touching the cleaned area with your fingers
- If your cam uses a suction mount, a tiny drop of cooking oil on the suction cup can help create a better seal
Pro tip: If you're installing in cold weather, warm up the windshield with the defroster for a few minutes first. Adhesive pads stick much better when the surface is at least 60°F.
Mounting the Dash Cam
Now for the fun part: actually attaching the camera. Most modern dash cams use one of two mounting systems: a suction cup or an adhesive pad. Both work well, but they have different strengths.
For suction mounts, simply press the cup firmly against the glass and flip the locking lever. These are great if you want to move the cam between vehicles or remove it for security.
For adhesive mounts, peel the backing off the pad, press the mount firmly against the glass for at least 30 seconds, and then let it cure for 24 hours before attaching the camera. Adhesive mounts are stronger, more permanent, and less likely to vibrate at high speeds.
Once the mount is secure, attach the camera and adjust the angle. Most experts recommend a lens position where the horizon sits about 40% from the top of the frame. This gives you a balanced view of the road and sky without too much dashboard or too much glare.
Routing the Power Cable
This is the step that separates a professional-looking install from a messy one. The goal is to hide the power cable completely so it doesn't dangle across your dashboard or get tangled in your steering wheel.
Here's the step-by-step process I use on every install:
- Plug the power cable into the dash cam and let the excess hang down
- Tuck the cable into the headliner (the fabric ceiling) starting at the camera
- Use a plastic trim tool to gently push the wire into the gap between the headliner and windshield
- Route it along the A-pillar (the trim piece beside your windshield)
- Continue down the door seal on the passenger side
- Run the cable under the glove box and toward the center console
- End the route at your 12V outlet or fuse box
If you have a vehicle with side curtain airbags in the A-pillar, be very careful. Route the cable behind the airbag, not in front of it, so it doesn't interfere with deployment. Most modern cars have a channel designed for wiring that runs alongside the airbag, so follow that path.
Connecting to Power
You have three main options for powering your dash cam, and each has its pros and cons.
The 12V cigarette lighter method is the easiest. Just plug it in and go. The downside is that the outlet usually only works when the car is on, so you won't get parking mode unless you have a battery pack.
Hardwiring to the fuse box gives you a cleaner, more permanent setup. You'll need a hardwire kit and an add-a-circuit fuse tap. Connect the red wire to a switched fuse (one that turns off with the car) for ignition mode, and the yellow wire to a constant fuse for parking mode. Always ground the black wire to a metal bolt or screw near the fuse box.
An OBD-II power adapter is a middle-ground option. It plugs into the diagnostic port under your dash and provides both switched and constant power without touching your fuse box. Just remember that the OBD-II port stays live, so it can drain your battery if left plugged in for weeks without driving.
Setting Up the Camera and Settings
Once everything is powered up, take a few minutes to configure your dash cam properly. These settings make a huge difference in the quality and usefulness of your footage.
- Resolution: Set it to the highest your camera supports, ideally 1080p or 4K
- Loop recording: Enable this so the cam automatically overwrites old footage when the card fills up
- G-sensor: Set to medium sensitivity to lock important files during sudden stops or impacts
- Time and date: Set these correctly so your footage holds up as legal evidence
- Parking mode: Enable if you hardwired or used a battery pack
- GPS: Turn on if your cam has it, for speed and location data
- Wi-Fi or app connection: Pair your phone now for easy file transfers later
Format the microSD card in the camera itself before your first use. This ensures the file system is optimized for dash cam recording and reduces the chance of errors.
Testing and Final Adjustments
Don't just assume everything works because the camera turned on. Take a 5-minute test drive and check the footage on your phone or computer. Look for a few key things:
- Is the horizon level, or is the camera tilted?
- Is there too much sky or too much hood in the frame?
- Is the footage clear at night, or is it just a blur of headlights?
- Does the audio pick up clearly without too much road noise?
- Do the parking mode and G-sensor work when you tap the brakes hard?
Make small adjustments to the camera angle as needed, and re-test until everything looks right. This is the time to catch issues, not after you've driven across the country.
Common Mistakes to Avoid
Over the years, I've seen a lot of dash cam installs go wrong. Here are the most common pitfalls and how to dodge them.
- Mounting too low, which blocks your view and catches too much dashboard
- Using a cheap SD card that fails in a few months
- Routing cables across the airbag path
- Leaving the cigarette adapter dangling in plain sight (a theft magnet)
- Forgetting to format the card after a few months of use
- Setting the G-sensor too high, which locks non-event files and fills the card
- Ignoring local laws about windshield obstructions
Frequently Asked Questions
How long does it take to install a dash cam?
For most people, a basic front-camera install using the 12V outlet takes about 20 to 30 minutes. If you're hardwiring to the fuse box or installing a dual-camera system, expect to spend 45 minutes to an hour, especially if it's your first time.
Can I install a dash cam without drilling or permanent modifications?
Yes. Most dash cams attach with adhesive pads or suction cups and plug into your 12V outlet. You can run the cable along the headliner and door seals without any tools or permanent changes. Hardwiring is optional, not required.
Is it legal to mount a dash cam on the windshield?
In most U.S. states and Canadian provinces, yes, as long as it doesn't obstruct your view. The general rule is to keep it within a 5-inch square in the lower corner of the windshield or within 7 inches of the top center. Always check your local laws to be sure.
Will a dash cam drain my car battery?
Only if it's hardwired or plugged into a constant-power outlet and left in parking mode for days without driving. Most cigarette lighter setups turn off with the car, so battery drain isn't a concern. If you're worried, use a dedicated dash cam battery pack instead of your car's battery.
Do I need a rear camera too?
A rear camera isn't essential, but it's highly recommended. It protects you against rear-end collisions, records hit-and-runs in parking lots, and provides evidence if someone is tailgating or road raging behind you. Many insurance companies also offer discounts for vehicles with dual-channel recording.
Final Thoughts on Your Dash Cam Installation
Installing a dash cam is one of those small projects that pays off big time. In just half an hour, you can give yourself a reliable witness on every drive, protect yourself against insurance fraud, capture unexpected moments on the road, and even lower your insurance premiums in some cases. The key is to take your time with the cable routing, invest in a quality SD card, and test your setup before you rely on it. Once you've done one install, every future one gets easier, and you'll start to see all the little places where a well-placed camera can make your driving life safer and more secure.