Installing a rear dash cam is a straightforward process when you use the right tools, mount it securely on the rear windshield, and route the power cable neatly along the headliner to a reliable power source. After helping dozens of friends and clients set up their vehicles over the years, I can tell you that taking your time with cable routing makes all the difference between a clean, factory-looking install and one that looks like a spaghetti mess behind your panels. Let me walk you through everything you need to know to get it done right the first time.
Tools and Materials You Will Need
Before you start drilling holes or sticking anything to your glass, gather your gear. Having everything within arm's reach saves you from leaving the job half-done to hunt for a screwdriver.
Essential tools:
- Rear dash cam kit with mounting bracket and adhesive pad
- Hardwire kit or 12V car charger (depending on your power preference)
- Trim removal tools (plastic pry tools, no metal screwdrivers)
- Microfiber cloth and isopropyl alcohol for surface prep
- Cable clips or adhesive cable holders
- Voltage meter or test light (for hardwiring)
- Fuse tap kit matching your vehicle's fuse type
- Wire strippers and crimpers
- Zip ties for bundling excess cable
Nice to have:
- Magnetic phone mount to hold the camera while you position it
- A helper to feed cable through tight spaces
- Painter's tape for temporary positioning before final mounting
Choosing the Right Mounting Location
Picking the right spot on your rear windshield is more important than most people think. Get this wrong, and you will end up with a camera that captures the sky, the headrest, or a giant blur of defroster lines.
The sweet spot is usually the upper center portion of the rear window, just below the top edge. This gives you a wide field of view covering the lane behind you and the surrounding areas. Avoid placing it directly over the defroster grid lines, as they can create a faint shadow in your footage. Also, stay clear of any tint strip at the top, as the adhesive may not bond well to that section, and it can also affect night vision performance.
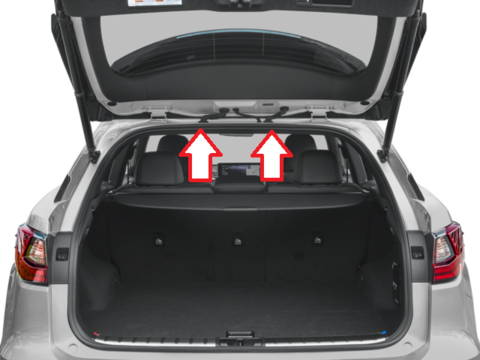
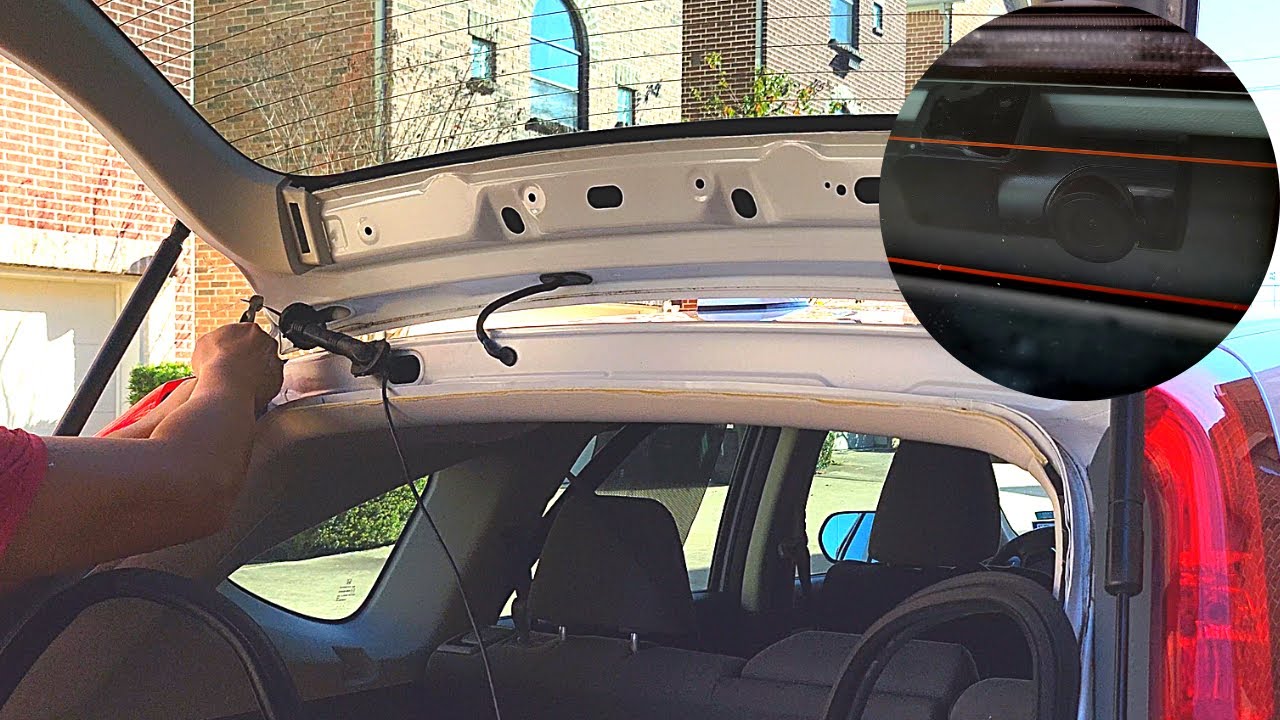
If your vehicle has a hatchback or liftgate with a separate rear window that opens, you will need to route the cable through a rubber boot between the body and the gate. Sedan owners have it easier since the rear window is fixed.
Prepping the Mounting Surface
Clean glass is happy glass, and happy glass holds your camera firmly for years. Skipping this step is the number one reason dash cams fall off mid-drive, and I have personally seen cameras slide down a windshield at 60 mph because someone used a dirty paper towel instead of actual cleaner.
Grab your microfiber cloth and some isopropyl alcohol (at least 70% concentration). Wipe the area where you plan to mount the camera, then let it dry completely for about 30 seconds. Any remaining grease, dust, or old adhesive will weaken the bond. If you are mounting over the dot matrix border (the black ceramic edge around the glass), clean that extra carefully because it tends to collect road grime.
Mounting the Rear Camera
Once the surface is prepped, you are ready to stick the camera in place. This part is quick but deserves a steady hand.
Steps to mount the camera:
- Peel the protective film off the adhesive pad on the mounting bracket.
- Hold the bracket against your chosen spot and press firmly for 30 seconds.
- Let the adhesive cure for at least 10 minutes before attaching the camera body.
- Slide or clip the camera onto the bracket once the adhesive has set.
- Adjust the angle so the lens captures the road behind you with a slight downward tilt.
Pro tip from experience: Do not mount the camera on a cold day if you can avoid it. Adhesive bonds much better when the glass is warm. If you must install in winter, park the car in a sunny spot or run the defroster for a few minutes to warm the glass first.
Routing the Power Cable
This is where most people either create a beautiful, hidden install or a tangled mess hanging from the headliner. The secret is patience and the right trim tools.
Starting from the rear camera, tuck the cable into the headliner using your fingers or a plastic trim tool. Work your way forward along the top edge of the windshield, then down the A-pillar or B-pillar on the passenger side. The passenger side keeps the cable away from the driver's line of sight and avoids airbag deployment zones on most vehicles.
When you reach the dashboard area, you have two options:
- Plug into a 12V outlet: Run the cable down to your center console or dash-mounted power socket. This is the easiest method and takes about 20 minutes.
- Hardwire to the fuse box: This gives you a cleaner look and enables parking mode features. Route the cable down to the driver or passenger side footwell fuse panel.
Avoid running the cable across the middle of the headliner or near the rearview mirror unless your front camera is mounted there. Cable across the glass looks messy and can reflect into your footage.
Hardwiring to the Fuse Box
Hardwiring looks intimidating at first, but once you understand which fuse to use, it becomes a 15-minute job. Most modern vehicles have a fuse box either under the dashboard on the driver side, in the passenger footwell, or under the hood.
Steps for a clean hardwire install:
- Identify a constant power fuse (always on, even when the car is off) or an accessory fuse (on only when the key is turned).
- Use a fuse tap that matches your fuse type (ATO, mini, micro2, etc.).
- Crimp the hardwire kit's red wire to the fuse tap's lead.
- Connect the black ground wire to a metal bolt or screw attached to the chassis.
- Plug the fuse tap into the original fuse slot, preserving the original circuit.
- Route the power cable up to the rear camera and connect it.
If your hardwire kit includes a low-voltage cutoff, you can leave the camera recording in parking mode without draining your battery. Set the cutoff to around 11.8V for lead-acid batteries or higher if you have an AGM or lithium setup.
Connecting the Front and Rear Cameras
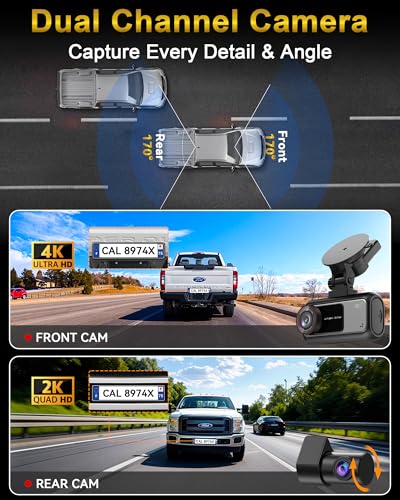
Many rear dash cams come as part of a dual-channel system that connects to a front camera. The rear camera typically plugs into the front unit via a long coaxial cable, which carries both power and video signal.
Steps to connect the two units:
- Plug the rear camera's cable into the port labeled "rear" or "R" on the front camera.
- Route the cable along the headliner as described earlier.
- Power on the system and check that both cameras are recording.
- Adjust the rear camera angle if needed based on the live view on the front unit's screen.
Some systems allow you to swap the front and rear inputs, so double-check the manual to ensure the front camera shows the road ahead and the rear shows the road behind.

Testing the System
Before you button everything up and call it a day, test the full system to make sure everything works as expected.
Things to verify during testing:
- Both cameras record clearly during the day
- Night vision or low-light performance is acceptable
- Audio recording works if your camera has a microphone
- The G-sensor detects impacts and locks the relevant footage
- Parking mode activates when the car is off (if hardwired)
- The microSD card is recognized and formatted properly
I always recommend doing a short test drive around the block after installation. Watching the footage back on your computer helps you spot any issues like a crooked angle, excessive glare, or a loose cable that vibrates in the wind.
Common Mistakes to Avoid
Over the years, I have seen people make the same handful of mistakes when installing rear dash cams. Avoiding these will save you time, frustration, and potentially a damaged camera.
Mistakes to watch out for:
- Mounting over the defroster lines, which can cause faint banding in footage
- Skipping the alcohol wipe and wondering why the camera fell off later
- Routing the cable over the driver-side airbag (a serious safety hazard)
- Using metal tools to pry trim pieces, which scratches and breaks clips
- Forgetting to format the SD card in the camera before first use
- Mounting too low, which obstructs the driver's rear view
- Taping over the camera lens (yes, I have seen this more than once)
Maintenance Tips After Installation
A rear dash cam is not a set-it-and-forget-it device, especially if you use it daily. A little maintenance goes a long way in keeping your footage reliable when you need it most.
Maintenance best practices:
- Format the SD card once a month to prevent file corruption
- Check the adhesive mount every few months, especially in hot climates
- Clean the lens with a microfiber cloth if footage looks hazy
- Update the camera's firmware when new versions are released
- Replace the SD card every 12 to 24 months, as flash memory wears out
- Test parking mode periodically to make sure it still triggers correctly
Frequently Asked Questions
How long does it take to install a rear dash cam?
For most vehicles, a basic installation using a 12V outlet takes about 30 to 60 minutes. Hardwiring to the fuse box adds another 20 to 30 minutes, and routing through a hatchback rubber boot can push the total time to 90 minutes or more if you are not familiar with your vehicle.
Can I install a rear dash cam without professional help?
Yes, most people with basic DIY skills can install a rear dash cam at home. As long as you are comfortable using trim removal tools and identifying a fuse to tap, you can do the whole job yourself with no special training. There are also plenty of vehicle-specific YouTube videos that walk you through the process.
Will a rear dash cam drain my car battery?
If you plug it into a 12V outlet that turns off with the ignition, it will not drain your battery. If you hardwire it for parking mode, a proper hardwire kit with a low-voltage cutoff will prevent the battery from dropping below a safe voltage, so drainage is rarely an issue.
Do I need a special SD card for a rear dash cam?
Yes, you should use a high-endurance microSD card designed for continuous recording. Standard cards wear out quickly under constant write cycles. Look for cards labeled "high endurance" or "dash cam rated" from reputable brands for the best results.
Is it legal to mount a dash cam on the rear windshield?
In most US states, mounting a dash cam on the rear windshield is legal as long as it does not obstruct your view. Some states have specific size and placement rules, so check your local laws if you are unsure. Generally, the upper center portion of the glass is the safest spot legally and visually.
Final Thoughts
Installing a rear dash cam is one of the smartest upgrades you can make for your vehicle, whether you are protecting yourself from hit-and-runs, capturing scenic drives, or simply having a reliable witness in case of an accident. With the right tools, a little patience, and a clean approach to cable routing, you can achieve a professional-looking install in under two hours. Take your time with the adhesive prep and cable hiding, and your rear camera will serve you reliably for years to come. Once it is set up, you will wonder how you ever drove without one, so grab your gear, pick a sunny afternoon, and get started on your install today.