There’s nothing worse than your air conditioner failing on a sweltering summer day, leaving you wondering if the compressor, the very heart of your cooling system, has quit for good. Figuring out how to test an air conditioner compressor properly can save you a ton of hassle and help you avoid unnecessary repair costs. It’s a job that needs a clear head and a steady hand because we’re dealing with high voltage and pressurized refrigerant.
Understanding these tests helps you decide if it’s a simple fix or a call to the pros. For instance, manufacturer specifications often indicate that a compressor's run winding resistance should fall within a specific range, usually a few ohms, with variations depending on the unit's tonnage and model. Let's dig into why diagnosing compressor issues accurately is so crucial.
Why Your AC Compressor Might Be Failing (And Why It Matters)
Your AC compressor is a workhorse, tirelessly pumping refrigerant to make your home comfortable. When it starts acting up, you'll usually notice pretty quickly, often because your air conditioner isn't cooling properly or it's making strange noises. Ignoring these signs can lead to bigger problems, costing you more in the long run.
Compressors can fail for a bunch of reasons. Sometimes it's electrical, like a bad start capacitor or an internal winding issue. Other times, it's mechanical, perhaps due to low refrigerant levels, dirty coils, or simply old age and wear. Pinpointing the exact cause helps you avoid replacing expensive parts that aren't actually broken.
Quick Insight: The Core Truth About Compressor Testing
The core truth about testing your AC compressor is that it involves checking two main areas: its electrical integrity and its mechanical function within the refrigerant system. You'll use specialized tools to measure voltage, amperage, electrical resistance, and refrigerant pressures. It's not just about getting a reading, it's about understanding what those numbers mean in the context of your specific unit.
The goal isn't just to see if it's "on" or "off." We're looking for subtle clues, like incorrect winding resistance or abnormal current draw, that tell us if the compressor is struggling, shorted, or completely open. Accurate diagnosis often requires comparing your readings against the manufacturer's specific charts and data, which you can typically find in the unit's service manual.
Understanding Your AC Compressor: What It Does and How It Works
Think of your AC compressor as the engine of your air conditioning system. Its job is to circulate refrigerant, a special chemical that absorbs heat from inside your home and releases it outside. It does this by taking low-pressure, cool refrigerant gas from the evaporator coil, compressing it into a high-pressure, hot gas, and then pushing it out to the condenser coil.
This compression process is what enables the refrigerant to release heat effectively outside. Without a functioning compressor, the refrigerant wouldn't move, and your AC wouldn't be able to cool your home. It’s a closed-loop system, so any disruption, whether electrical or mechanical, brings the whole cooling process to a halt.
Critical Components Involved in Compressor Operation and Testing
Understanding how your compressor works means knowing the key players that help it do its job. These aren't just parts of the compressor itself, but also crucial components that support its operation. When troubleshooting, you'll often be testing these related parts as well, because a failure in one can look like a compressor problem.
The Compressor Itself: Heart of Your AC
Inside the compressor, you've got motor windings, often called the run, start, and common windings. These create the electromagnetic field that spins the motor, driving the compression mechanism. An internal overload protector is usually built in, designed to trip and shut down the compressor if it gets too hot, preventing permanent damage.
Electrical Brains: Capacitors and Contactors
- Start Capacitor: This component gives the compressor a powerful jolt of electricity to get it spinning initially. It's like the starter motor in your car, providing a quick burst of energy. A faulty start capacitor is a common reason a compressor hums but won't start.
- Run Capacitor: Once the compressor is running, the run capacitor helps maintain its efficiency by ensuring a smooth, continuous power supply to the motor windings. If this fails, the compressor might struggle, draw too much power, or eventually stop running altogether.
- Contactor: This is essentially a heavy-duty relay that acts as a switch, connecting high-voltage power directly to the compressor and outdoor fan motor when your thermostat calls for cooling. If the contactor isn't pulling in, or its contacts are burnt, power won't reach the compressor.
The Lifeline: Refrigerant and Pressure
The refrigerant itself, often R-410A in newer systems as of 2026, or older R-22 units, is what carries the heat. You'll measure its pressure using a manifold gauge set, which tells you a lot about the system's health. High or low pressures can indicate issues like leaks, blockages, or an overcharged system, all of which impact the compressor's performance and lifespan.
Before You Start: Essential Safety Gear and Procedures
Working on an AC unit, especially around the compressor, isn't something to take lightly. We're dealing with potentially lethal high voltage electricity and refrigerants under high pressure, which can cause severe frostbite or chemical burns. Skipping safety steps isn't just risky, it's downright dangerous.
Power Down, Stay Safe: The Golden Rule
Before you touch anything inside the condenser unit, you absolutely must disconnect the power. Find the dedicated AC disconnect switch, usually a small box mounted on the wall near your outdoor unit, and pull the fused block or flip the breaker inside it. Don't stop there; also go to your main electrical panel and flip the circuit breaker that controls your outdoor unit. This dual approach ensures the unit is completely de-energized, following safe lockout/tagout (LOTO) procedures recommended by OSHA standards for preventing unexpected startup.
Personal Protective Equipment You Can't Skip
Always wear appropriate Personal Protective Equipment (PPE). This includes:
- Electrical Safety Gloves: Rated for high voltage, these protect against accidental shocks.
- Safety Glasses: Essential for protecting your eyes from flying debris, refrigerant spray, or electrical arcs.
- Long Sleeves and Pants: Provides a layer of protection against sharp edges and potential refrigerant exposure.
- Closed-Toe Shoes: Protect your feet from falling tools or electrical hazards.
Tools You'll Need for Accurate Compressor Testing
Having the right tools is half the battle when you're diagnosing AC issues. Trying to make do with improper equipment can lead to inaccurate readings, wasted time, and even safety risks. You’ll need a few specialized items that are standard for HVAC diagnostics.
Here's a breakdown of the essential tools:
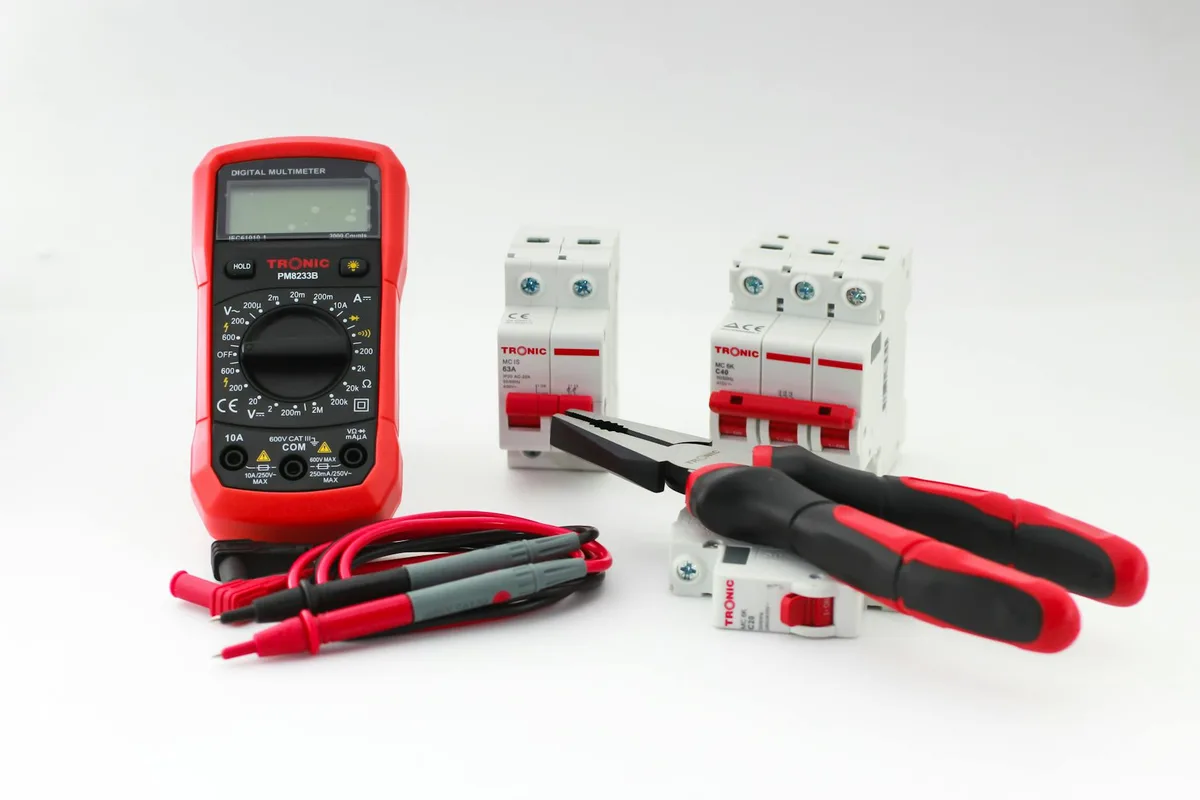
- Digital Multimeter (DMM): This is your primary electrical testing device. You'll use it to measure voltage (AC), resistance (ohms), and sometimes capacitance (microfarads, µF). Make sure it's rated for the voltage you'll be working with, typically 240V AC.
- Clamp Meter (Amp Meter): While your DMM might measure amperage, a clamp meter is specifically designed to measure current draw without breaking the circuit. It's crucial for checking the compressor's running amperage and Locked Rotor Amps (LRA).
- Manifold Gauge Set: This specialized set of gauges measures the high-side and low-side pressures of the refrigerant system. It's vital for understanding the mechanical health of the compressor and the overall refrigerant circuit. Note that proper use requires EPA 608 certification for refrigerant handling.
- Capacitor Discharge Tool: Before touching a capacitor, it's critical to discharge any stored electrical energy. This tool safely drains residual voltage, preventing painful and dangerous shocks. A screwdriver with an insulated handle can also be used, but a dedicated tool is safer.
- Insulated Screwdrivers and Wrenches: You'll need these for accessing panels, disconnecting wires, and manipulating service valves. Insulated handles provide an extra layer of protection against electrical current.
Step-by-Step: Testing Your AC Compressor's Electrical Health
Once you've safely disconnected the power and geared up with your PPE, you can start the electrical diagnostic process. We're going to systematically check the components that directly supply and manage power to the compressor. Each test builds on the last, helping you narrow down the fault.
Checking the Capacitor: Your Compressor's Starting Boost
The capacitor is a frequent culprit when a compressor isn't starting. You'll need to locate the capacitor in the condenser unit, usually a cylindrical component. Always discharge it fully before handling, even if the power is off, because it can store a charge.
To test, first inspect it visually for swelling, leaks, or burn marks, which are clear signs of failure. Then, use your DMM set to capacitance (µF) to measure its microfarad rating. Compare this reading to the "mF" or "µF" rating printed on the capacitor's label. If the reading is outside of a 5-10% tolerance range of the labeled value, the capacitor is likely bad and needs replacing.
Testing the Contactor: Is Power Getting Through?
The contactor connects the high-voltage power to your compressor. With all power still off, visually inspect the contactor for burnt or pitted contacts. These indicate arcing and poor connection. Then, manually press the plunger in; it should move freely without sticking.
To test electrically, after restoring power (briefly, just for this test, then disconnect again), check for 240V AC across the line side terminals and then across the load side terminals when the thermostat is calling for cooling. If you have voltage on the line side but not the load side, and the thermostat is calling for cooling, the contactor is faulty. Remember to power off again before any further physical contact with components.
Measuring Compressor Winding Resistance: The Ohm Check
This is a critical test for the compressor's internal motor. With the power completely off and the capacitor discharged, disconnect the wires from the compressor terminals (Common, Run, Start). Set your DMM to ohms (Ω).
Measure the resistance between each pair of terminals:
- Common to Run (C to R): This reading should be the lowest.
- Common to Start (C to S): This reading will be higher than C to R.
- Run to Start (R to S): This reading should be approximately the sum of C to R and C to S.
Compare these readings to the manufacturer's specifications for your compressor model. If any reading is significantly off, or if one is open (infinite resistance), it indicates a winding fault, meaning the compressor motor is likely bad.
Grounded Compressor Test: A Critical Safety Check
A grounded compressor means the internal motor windings are touching the compressor's metal housing, creating a short circuit. This is a serious fault that will trip your circuit breaker and can be very dangerous. To perform this test, keep the power off and disconnect all wires from the compressor terminals.
Set your DMM to continuity or a high ohms range. Place one probe on a clean, unpainted metal part of the compressor casing (ground) and the other probe on each of the compressor terminals (C, R, S) one by one. You should get an "OL" (open loop) or infinite resistance reading on all terminals. If you get any resistance reading, especially a low one, it means the winding is grounded, and the compressor needs replacement.
Testing Your AC Compressor's Mechanical Health (Refrigerant System)
Beyond electrical checks, the compressor's ability to move and pressurize refrigerant is paramount. This involves using a manifold gauge set, which requires a bit more expertise and adherence to strict environmental regulations regarding refrigerant handling. If you're not EPA 608 certified, this part is definitely best left to a professional.
Hooking Up Your Manifold Gauges Safely
First, ensure your AC unit is running and has been for at least 10-15 minutes to stabilize pressures. Connect the blue hose from your manifold gauge set to the low-pressure service port (suction line, typically the larger insulated line), and the red hose to the high-pressure service port (liquid line, typically the smaller uninsulated line). Always make sure the service valves are closed on your gauge set before connecting.
Slowly open the service valves on the AC unit. You'll see the gauges register the system's static pressures. Then, slightly open the manifold gauge valves to allow refrigerant into the gauges. Remember, proper refrigerant handling prevents environmental release.
Interpreting Pressure Readings: Static vs. Running
With the unit running and gauges connected, you'll get two sets of crucial readings:
- Static Pressure: This is the pressure when the compressor isn't running. It helps identify if the system has adequate refrigerant charge, considering the outdoor ambient temperature.
- Running Pressure: These are the pressures while the compressor is actively circulating refrigerant. The low side should show a lower pressure (e.g., 60-80 PSIG for R-410A) and the high side a significantly higher pressure (e.g., 250-300 PSIG for R-410A), though these values vary greatly with outdoor temperature and system type.
Abnormal running pressures, like very low suction pressure with high discharge pressure, could point to a restricted metering device or a low refrigerant charge. Conversely, high suction and high discharge pressures might indicate an overcharge or a failing compressor valve unable to adequately compress the refrigerant.
What Your Test Results Mean: Diagnosing Common Compressor Issues
Now that you've gathered your data, it's time to play detective and figure out what the numbers are telling you. Each symptom and reading combination points towards a specific failure, or at least narrows down the possibilities significantly. This is where your readings, combined with the compressor’s symptoms, start to make sense.
No Power, No Go: Electrical Supply Problems
If your compressor isn't getting any power, it's obviously not going to run. This usually shows up as no voltage at the contactor's load side or at the compressor terminals. The problem could be:
- Tripped Circuit Breaker or Blown Fuse: A basic electrical safety mechanism has done its job. Reset the breaker or replace the fuse (only if the underlying fault has been identified and fixed, otherwise it will just blow again).
- Failed Contactor: If the contactor coil isn't energized (no voltage across its coil terminals) or the contacts are burnt, power won't pass through.
- Thermostat Issue: The thermostat might not be sending the signal to the condenser unit, so the contactor never engages.
The Hum-and-No-Run: Capacitor or Winding Issues
This is a classic symptom: the compressor tries to start, you hear a hum, but it never fully kicks in. This almost always points to an electrical starting problem.
- Bad Start or Run Capacitor: If your capacitance test showed the microfarad rating is outside the acceptable range, the compressor isn't getting the necessary electrical boost to overcome its locked rotor amperage (LRA).
- Open Start Winding: If your DMM showed infinite resistance between the Common and Start terminals, the start winding is broken internally. The run winding might still have continuity, causing the hum, but the motor won't turn.
Complete Silence: Open Windings or Contactor Failure
If your compressor doesn't make any noise and simply doesn't run, it generally means no power is reaching it or there's a catastrophic internal electrical failure.
- Completely Open Compressor Winding: If all your winding resistance tests (C to R, C to S, R to S) show infinite resistance, the motor windings are completely open, meaning no current can flow. The compressor is dead.
- Contactor Not Pulling In: As discussed, if the contactor isn't closing and supplying power, the compressor won't ever receive the electricity it needs. Check the 24V signal from the thermostat to the contactor coil.
Tripping Breaker: Ground Faults or Locked Rotor
A compressor that consistently trips your circuit breaker is signaling a severe problem. This indicates an excessive current draw.
- Grounded Compressor: Your winding-to-ground continuity test should have caught this. If the windings are shorted to the compressor casing, it creates a direct path to ground and trips the breaker immediately. This requires compressor replacement.
- Locked Rotor: Sometimes, the internal mechanical parts of the compressor seize up. When the electrical motor tries to start, it can't turn, drawing incredibly high current (the LRA value), which quickly trips the breaker. You'd likely see the compressor trying to hum briefly before the trip.
Incorrect Pressures: Refrigerant System Problems
Abnormal readings from your manifold gauges point to issues within the sealed refrigerant system, which can directly impact the compressor's performance and lifespan.
- Low Suction, Low Discharge Pressure: Often means a low refrigerant charge, possibly due to a leak. This forces the compressor to work harder, eventually leading to overheating and failure.
- High Suction, High Discharge Pressure: Could indicate an overcharged system or restricted airflow over the condenser coil. The compressor struggles to pump against excessively high head pressure.
- High Suction, Low Discharge Pressure: This is a strong indicator of a failing compressor, specifically that its internal valves or pumping mechanism aren't effectively compressing the refrigerant. It's essentially "pumping" gas without building adequate pressure.
Common Mistakes to Avoid When Testing Your AC Compressor
Even with the right tools and knowledge, it's easy to make small errors during the testing process that can lead to misdiagnosis or, worse, safety hazards. Being aware of these common pitfalls can save you a lot of trouble. We've seen these mistakes happen countless times, and they're usually preventable.
Here are some of the most frequent errors:
- Forgetting to Discharge Capacitors: This is a big one. Capacitors can hold a significant electrical charge even after the power is off. Failing to discharge them can result in a dangerous electrical shock. Always use a proper discharge tool or an insulated screwdriver.
- Not Referring to Manufacturer Specs: Every AC unit and compressor is a bit different. Relying on generic resistance or pressure values without checking your specific unit's service manual can lead you astray. Always cross-reference your readings with the official documentation.
- Inaccurate Multimeter Readings: Not setting your multimeter to the correct function (ohms, volts, microfarads) or not ensuring good contact with the terminals can give you false readings. Double-check your settings and probe placement.
- Ignoring Ambient Temperature for Pressure Readings: Refrigerant pressures are highly sensitive to the outdoor air temperature. What looks like an incorrect pressure reading on a cool day might be normal if you account for the temperature difference.
- Releasing Refrigerant into the Atmosphere: This isn't just a mistake, it's illegal and harmful to the environment. Refrigerant must be recovered using EPA-approved equipment by a certified technician. Don't vent it.
When to Call a Pro: Recognizing Your Limits and High-Risk Situations
While basic electrical checks on your AC compressor can be done by a knowledgeable DIYer, there are definitely times when stepping back and calling a certified HVAC technician is the smartest and safest choice. This isn't about giving up, it's about making an informed decision, especially when safety or complex technical work is involved.
You should absolutely call a professional if any of these situations arise:
- Refrigerant System Work: If your diagnosis points to low refrigerant, a leak, or any issue requiring the use of a manifold gauge set and recovery equipment, you need a professional. Handling refrigerants requires specialized training and EPA 608 certification.
- High Voltage Discomfort: If you're not entirely comfortable working around high voltage (240V AC), don't push it. Electrical work can be dangerous, and a professional has the experience and safety protocols to manage it.
- Complex Electrical Faults: Sometimes, diagnosing an electrical issue goes beyond a simple capacitor or winding test, involving control boards or complex wiring diagrams. Technicians have advanced diagnostic tools and training for these scenarios.
- Grounded or Shorted Compressor: While you can diagnose this, replacing a compressor is a major job involving brazing, vacuuming the system, and recharging with refrigerant. This is definitely not a DIY task.
- Uncertainty: If you're ever unsure about a reading, a procedure, or what to do next, it's always better to consult an expert. Their expertise can prevent further damage or injury.
FAQs About AC Compressor Testing and Repair
We get a lot of questions about AC compressors, so we've put together answers to some of the most common ones. Hopefully, these clear up any lingering doubts you might have.
How long does a typical AC compressor last?
A typical AC compressor, with proper maintenance, generally lasts between 10 to 15 years. Factors like consistent maintenance, proper refrigerant charge, and moderate usage all contribute to its lifespan. Extreme temperatures or frequent short-cycling can reduce this.
Can a compressor be repaired, or does it always need to be replaced?
In most cases, if the internal motor windings are bad (open or shorted) or the internal mechanical components have seized, the entire compressor unit needs replacement. Repairs are generally not practical or cost-effective for internal compressor failures. However, external components like capacitors or contactors are easily replaceable.
What's the difference between a start capacitor and a run capacitor?
The start capacitor provides a large burst of power for a very short duration to help the compressor overcome its initial inertia and start spinning. The run capacitor, on the other hand, provides continuous, smaller assistance to the motor windings, helping it run efficiently once it's already started.
Is it normal for my compressor to hum loudly?
A soft hum can be normal when the compressor is running. However, a loud, continuous humming without the compressor actually starting, or a grinding noise, is a clear sign of trouble. This often points to a failed start capacitor or a locked rotor situation.
Can low refrigerant damage my compressor?
Yes, absolutely. Low refrigerant levels force the compressor to work harder, generating excessive heat and running without adequate lubrication (as the oil circulates with the refrigerant). This significantly increases wear and tear, often leading to premature compressor failure. Manufacturers like Trane and Carrier emphasize maintaining correct refrigerant levels to ensure longevity.
Final Thoughts: Staying Cool and Staying Safe
Diagnosing your AC compressor can feel like a big job, but by breaking it down into manageable steps and understanding what you're looking for, you can often pinpoint the problem. Remember, safety is always the priority. Never compromise on proper lockout/tagout procedures and personal protective equipment.
Having accurate information empowers you to make the right decisions, whether that's replacing a simple component or knowing when it's time to call in a certified HVAC professional. Your comfort and safety are paramount, so approach these tests with care and confidence.